HASS + Proxmox: Automatic Backups to Synology NAS


This week I checked off another goal for my Home Assistant setup – automated backups! Once a week, my entire Home Assistant VM is backed up to my Synology NAS which is protected with RAID 1. This setup gives me good protection against all hardware and software failures, and it gives me more confidence to experiment and break things because I know I can always roll back.
The biggest reason I migrated to a virtualized environment was to have the ability to easily back up and restore my entire Home Assistant installation. This ensures that I can recover from most failures quickly without having to fuss with HASS snapshots, docker addons, zigbee/zwave devices, etc. I can simply restore the latest backup to a new node in Proxmox and get everything back online. This solution is also hardware agnostic, so I can restore the backup on an entirely new server and everything should work seamlessly.
I used my Synology NAS as the "offline" backup location so that I can keep my backups on separate hardware. Below I will show how I configured the Synology and resolved some of the issues along the way.
Synology Setup
The first step was to set up the Synology as a CIFS storage location. To set this up, I configured a new share and I provisioned a new user with access to the share.
I started by creating a new user called proxmox with minimal permissions.
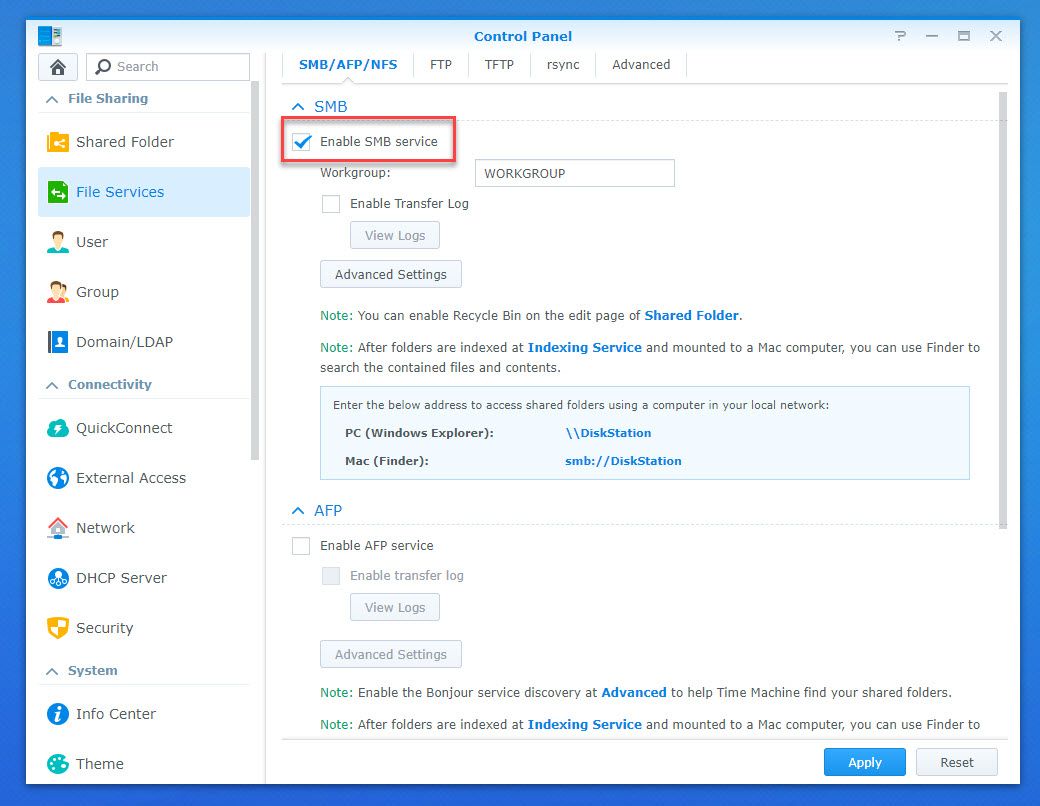
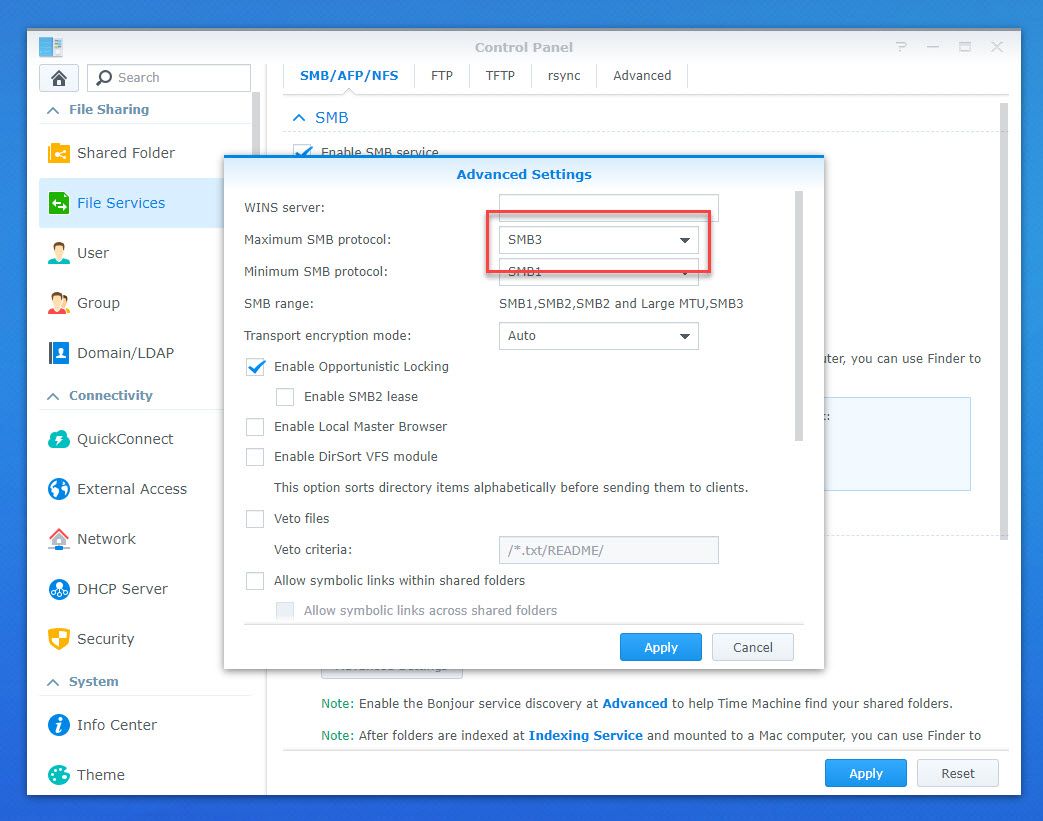
Next, I set up the share. It's important to ensure that a few settings are enabled first. The SMB service needs to be enabled. After that, go into Advanced Settings and make sure that the maximum SMB protocol is set to SMB3. ***You will get errors in Proxmox if you do not allow SMB3***
Now that SMB was configured, I set up a new Share Folder to store the backups, making sure the new user account has read/write permissions on the shared folder.
Proxmox Configuration
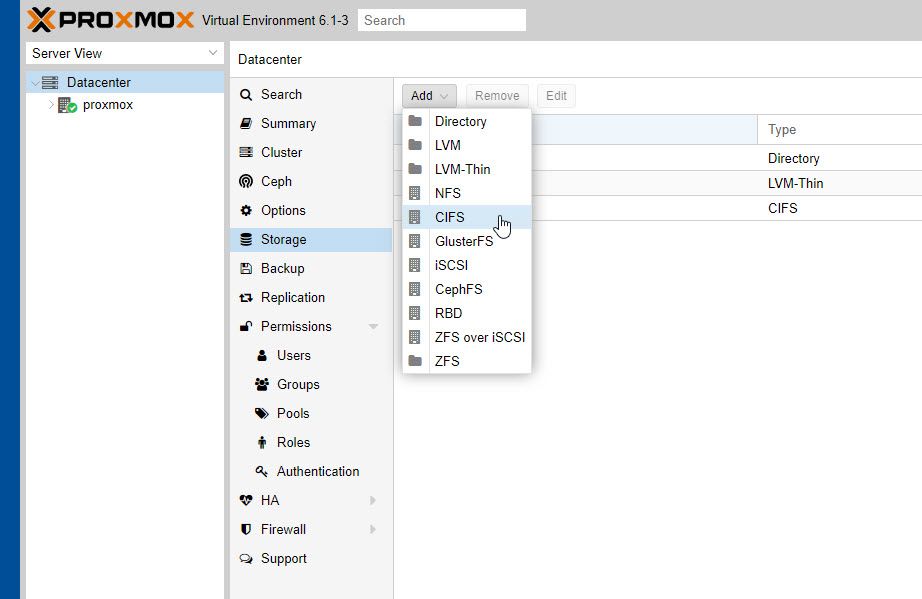
Now that the share is set up, I configured it as a storage location in Proxmox. Log in to Proxmox and add a new CIFS location on the Storage tab.
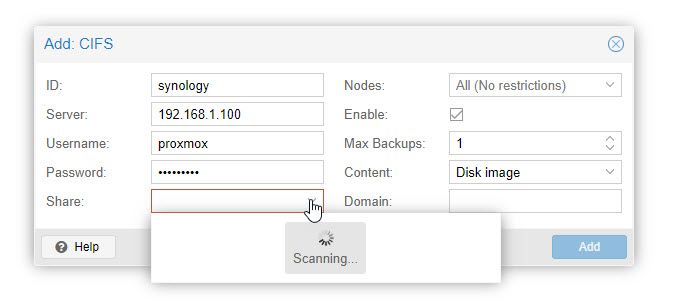
Fill out the CIFS form:
- ID: make up an alias for this location
- Server: the IP of the Synology
- Username/Password: the credentials you created for the new share
- Share: the name of the shared folder
- Max backups: number of backups allowed before Proxmox starts overwriting
- Content: choose VZDump, Disk Image, ISO image, and Containers
Once you fill in the IP and username/password, if you click on Share you will load the list of available shares. If you set up the Synology correctly, you should see the shared folder you created plus any others that are publicly accessible. If you messed something up, you will see an error popup at this point. My problem was that I did not set up the correct SMB version (see steps above to fix this).
Once the form is filled out, click Add to complete this step.
Next, go to the Backup tab and Add a new backup job.
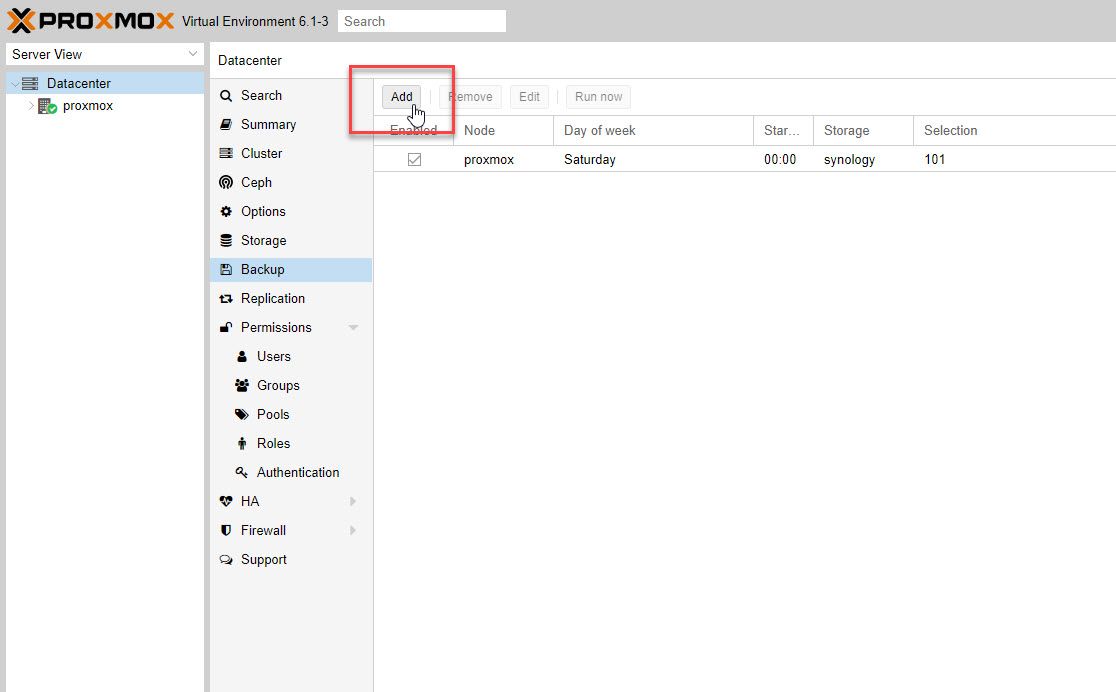
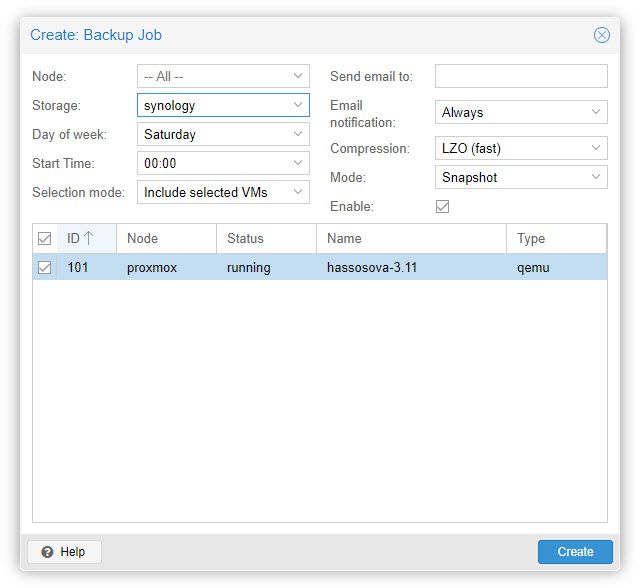
Configure the backup job:
- Node: All
- Storage: choose your newly created storage location
- Day of week: choose one or more days
- Start time: choose a start time
- Selection mode: back up all VMs, or specific VMs. I just chose my HA VM
Click Create to complete the form.
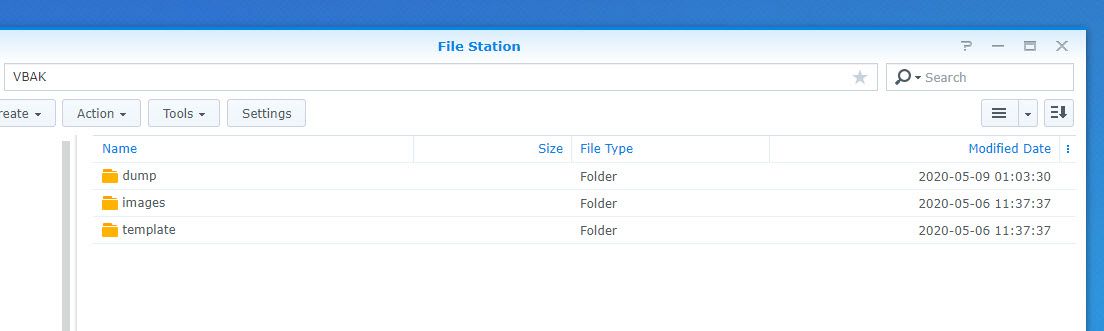
At this point I was done, but I wanted to test and make sure the backups were working. To test it, just select the backup job and click the 'Run now' button and monitor the task to see that it completes. If it works, you should see a new folder structure in the Synology share:
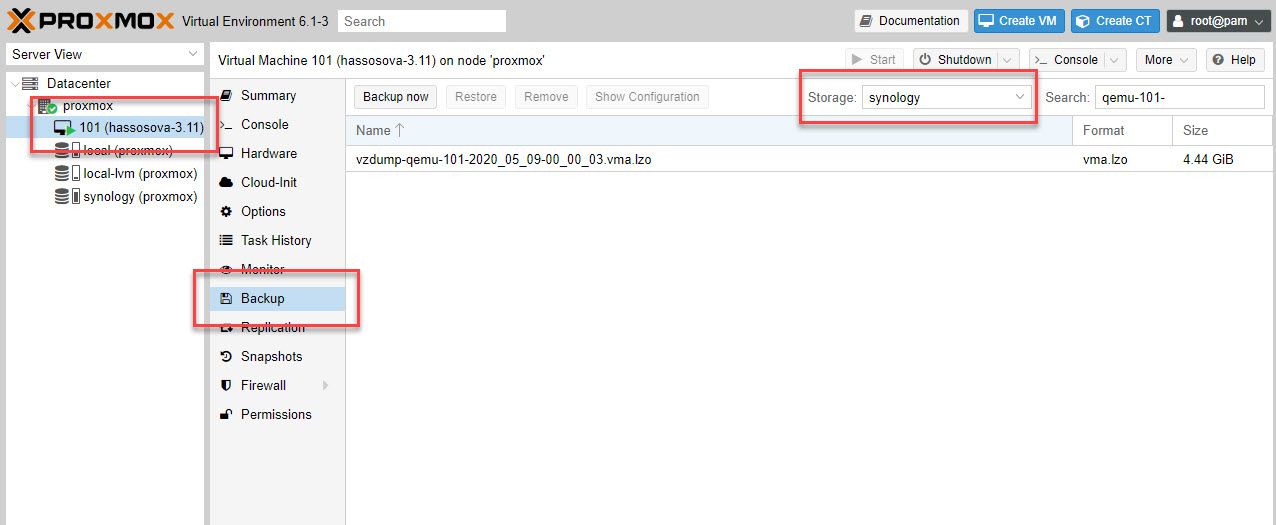
Restoring Backups
To restore backups, you have to navigate to the specific VM and go to the Backup tab. From there, you have to select the right storage location to get the list of available backups. Just click Restore and you're done!
You can also create a brand new VM and restore the backup to that VM as well. This gives you the ability to recover from pretty much any failure you might experience.
Update: my automated backups have been running every Saturday night for several months now. I rely on the backups so heavily now that I almost couldn't live without them at this point. The whole point of home automation is to cut down on repetitive tasks, and I have now cut out the worst one: fixing my HA when things blow up.
I had mostly forgotten about them until one day I woke up and several my deCONZ devices started showing unavailable. I was able to restore the latest backup and fix everything with very little effort. In the past, I would have spent all day ripping apart configs and frustrating my wife. Now I'm able to open Proxmox on my phone and restore a backup in just a few minutes, without even getting off of the couch.
The backups have also saved me a few times when certain updates of HA didn't play well. I feel more free to experiment and break things in my setup because I can always roll back. No more stress that I might screw something up and spend all day fixing it. The payoff from this setup makes this my favorite automation by far!