Home Assistant - Better Blue Iris Integration
In this post, I will show how I greatly improved the performance of my Blue Iris cameras in Home Assistant. Rather than using the camera component, I am using iframes to directly embed the UI3 interface into Lovelace.

In this post, I will show how I greatly improved the performance of my Blue Iris cameras in Home Assistant. Rather than using the camera component, I am using iframes to directly embed the UI3 interface into Lovelace. At the end of this post I have included a setup guide to show you how I achieved the following improvements:
- 90% less bandwidth per camera
- Low latency and high responsiveness
- High quality
- Externally accessible over secure HTTPS
Bandwidth Issues
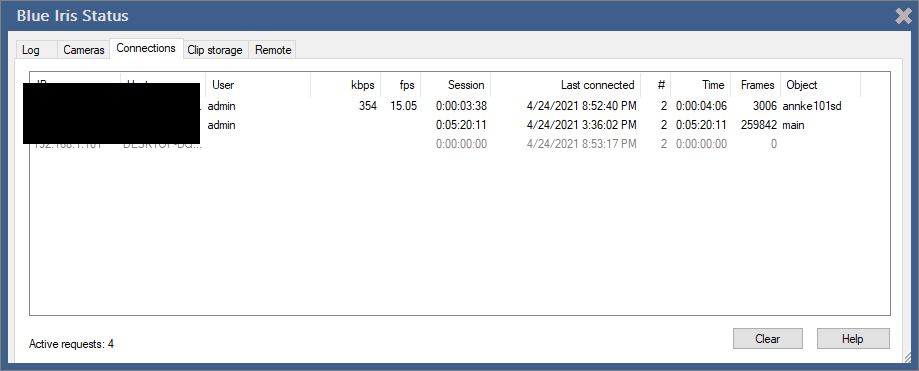
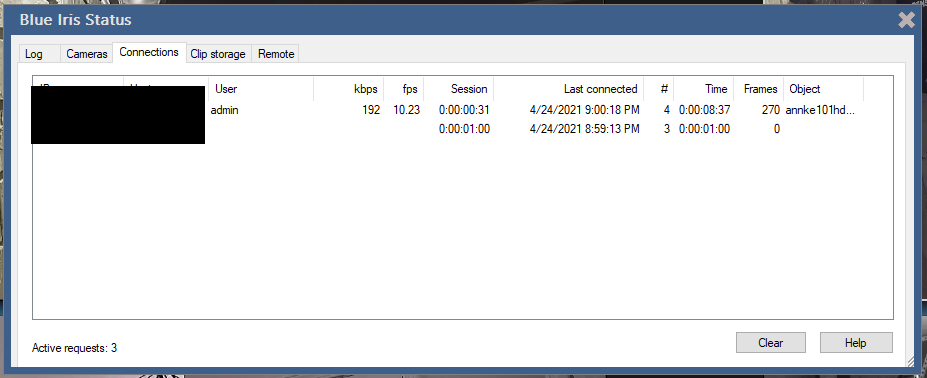
I have multiple kiosks around the house which have camera feeds open, and recently when I added a new camera to my house I noticed that my wireless network started to choke. That's when I looked at the connections in Blue Iris to see how much my cameras were impacting the network.
It turns out that my connections to Home Assistant were constantly pulling around 30mbps. If I opened the HA app on my phone, the bandwidth would go up even more. Add in a few devices streaming Netflix and Youtube and it is pretty clear why the network was starting to die. Just to confirm, I turned off the BI web server and saw all of my network issues went away.
Mjpeg Camera Component
Up until this point, I was using the mjpeg camera platform for each of my cameras in Blue Iris. Here is a simplified example:
camera:
- platform: mjpeg
  mjpeg_url: http://[BI_PI_ADDR]:[BI_PORT]/mjpg/[BI_CAMERA_SHORTNAME]
name: Driveway CameraTo check the bandwidth, you can open the url shown above in a browser and check the status in Blue Iris.
What I found above is that a single stream from a 480p (!!!) camera pulls around 6mbps. I knew that mjpeg streams were uncompressed but I had no idea that a low definition feed would pull so much bandwidth.
You can use some tricks like specifying the size and quality in the url, for example http://[BI_PI_ADDR]:[BI_PORT]/mjpg/[BI_CAMERA_SHORTNAME]?q=25&s=50. But this just turns the stream into a potato.
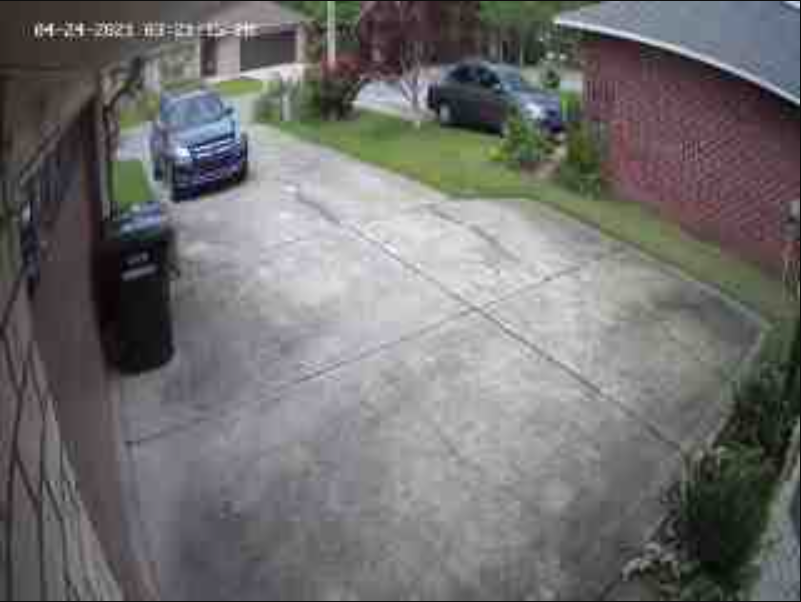
And this beautiful picture still requires 1mbps of bandwidth per connection. Not great!
H264 Live Streams
At this point, I spent a long time playing around with different ways to get h264 streaming working. The idea is that HA will pass through a highly compressed stream which gets decoded and rendered on the tablet or smartphone. I tried the Stream component and the ffmpeg platform, and in the rare instance I got a stream to play on my device, I had three major issues:
- The stream took several seconds to buffer and open, and often stopped and buffered some more.
- The decoding was never very good. The picture was always blocky and the decoder could never smooth things out.
- The stream was 15-30 seconds behind realtime. This seems to be a common problem and major drawback of HLS streams.
And on top of all of that, the h264 streams still pulled 2-3mbps, almost as bad as the mjpeg streams. Regardless, the 30 second delay was enough of an issue for me to rule out HLS streams as an option.
Blue Iris UI3 Web Viewer
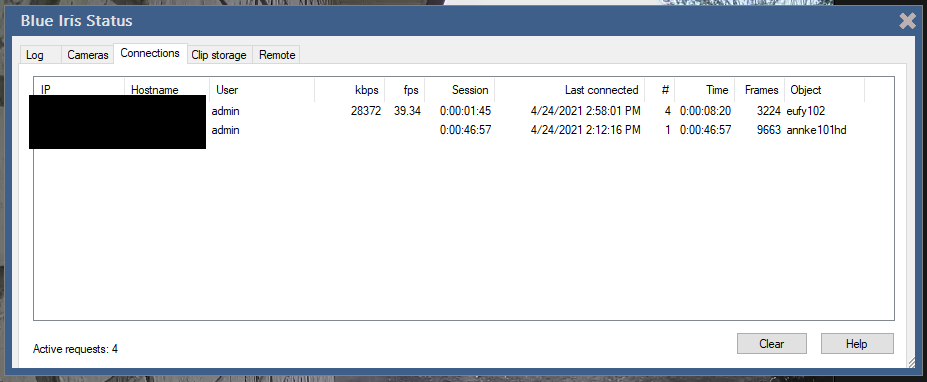
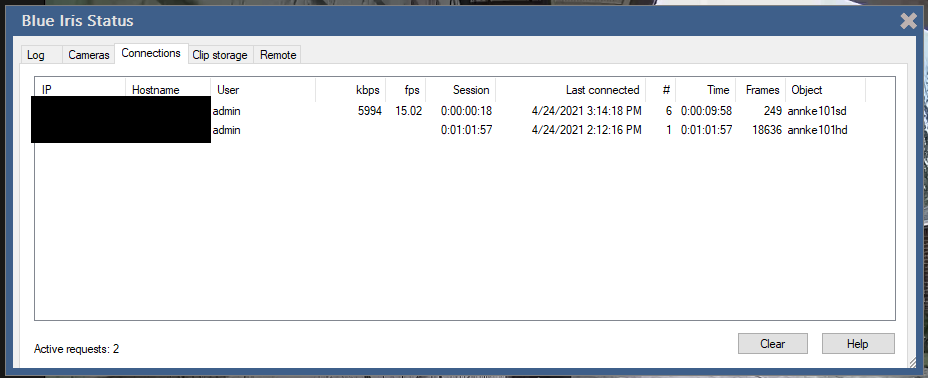
Once I had given up on mjpeg and h264 streams, I thought I was out of options. I began to dig into the built-in web viewer from Blue Iris to see if I could learn how it was handling camera feeds. Out of curiosity, I checked the status page and I was amazed by what I saw.
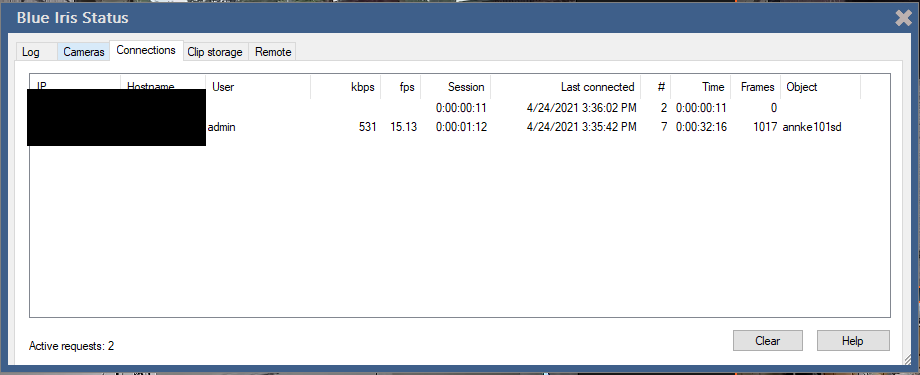
When viewing the same camera, on it's native resolution and framerate, UI3 is only pulling around 500kbps. This is much more in line with what I would expect from a standard definition h264 stream. Even better, the playback is extremely smooth, without any of the freezing/buffering/pixelation issues I had experienced so far.
This is exactly what I want in my Lovelace views – the best of both worlds: high quality and low bandwidth. The rest of this guide will walk through how I was able to render UI3 into Lovelace and make it accessible both inside and outside of my home network.
Setup Guide
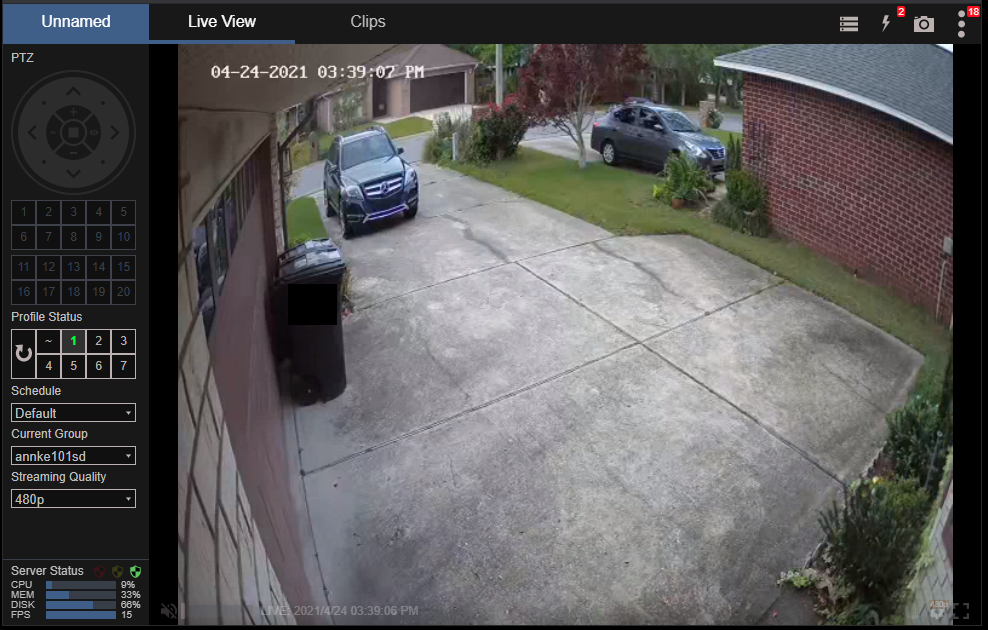
The basic idea is to use iframes to render UI3 as a Lovelace card by setting URL parameters to load UI3 in a specific way. For example, a url like
https://[BI_HOST]:[BI_PORT]/ui3.htm?maximize=1&cam=driveway
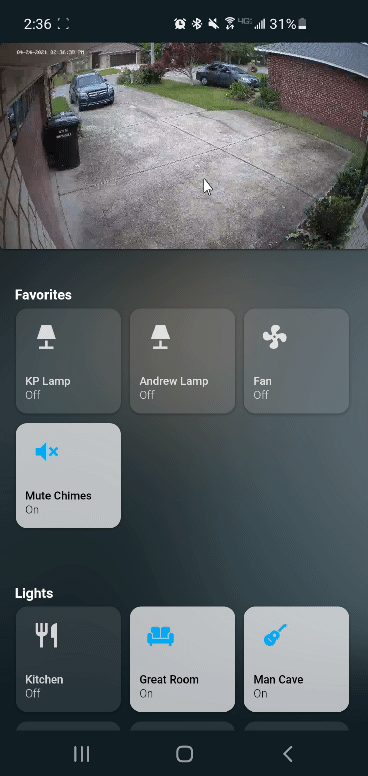
will open the web player with the driveway camera maximized. If you configure a Lovelace iframe card with this url, you will get a camera tile like this:
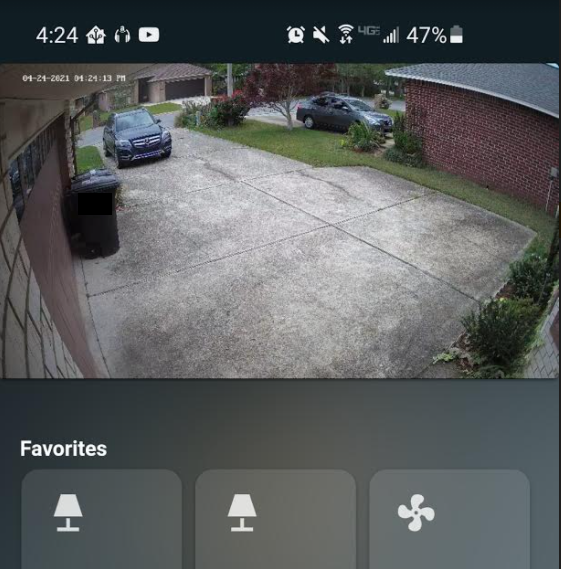
If you only use Home Assistant at home and you don't use HTTPS, then this is all you would have to do. But if you want to access Home Assistant and view your cameras from outside of your network, there is a bit more setup involved.
Remote Access over HTTPS
The first step is to make Blue Iris accessible from the internet. You can do this for free with DuckDNS and Let's Encrypt:
 nickdaria
This guide is a great starting point, but I deviated a bit because I also want Home Assistant to be available externally. You should follow the guide above, but with these extra steps:
1. First, set up a new domain on DuckDNS. For example if you were already using "mydomain.duckdns.org" for your Home Assistant, add another one like "mydomainbi.duckdns.org".
2. Update your DuckDNS add-on config to include your new domain and restart the add-on. Check the logs to make sure the add-on updated your SSL certificate with the new domain.
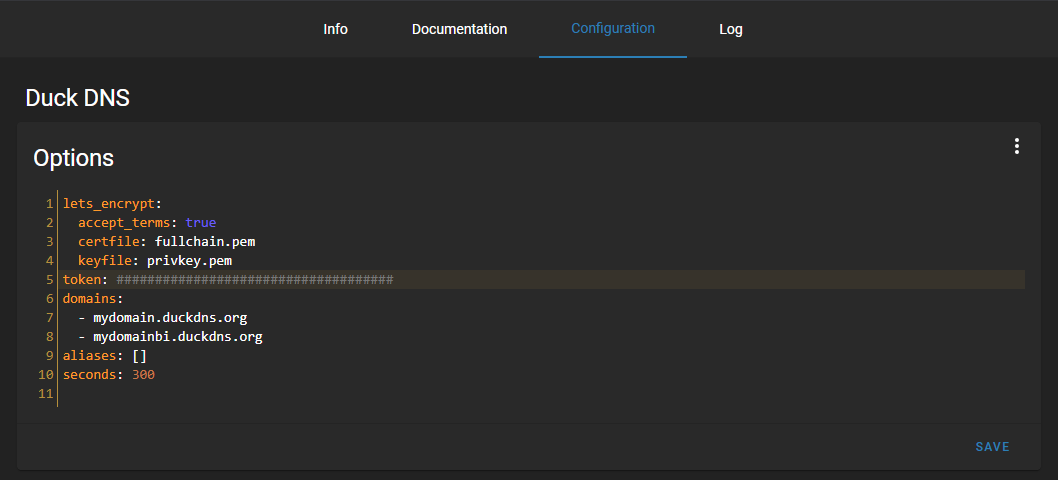
3. Now follow the guide until you get to the step where you are setting up the SSL certificate. Instead of generating a new SSL cert with Let's Encrypt, instead add a Custom certificate. Name it with your "mydomainbi.duckdns.org" domain and upload the certificate and key files from your HA instance. Then repeat the process using your other domain name. Nginx should show two certificates now – one will be used for HA and the other for BI.
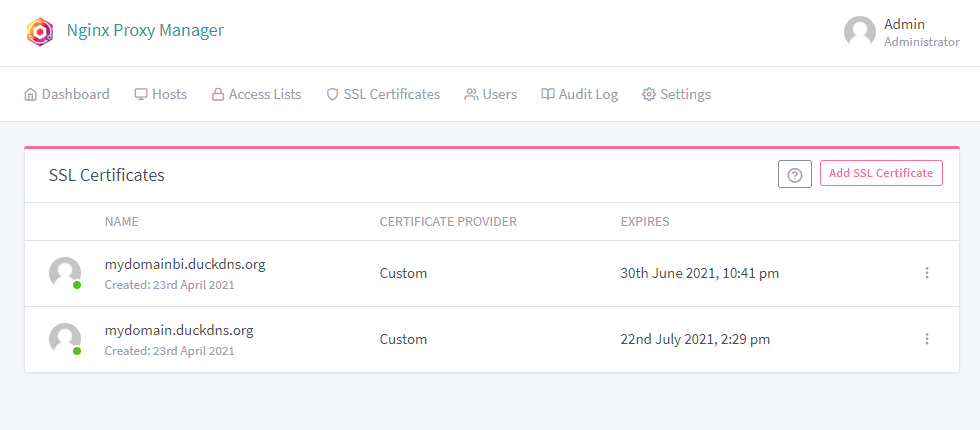
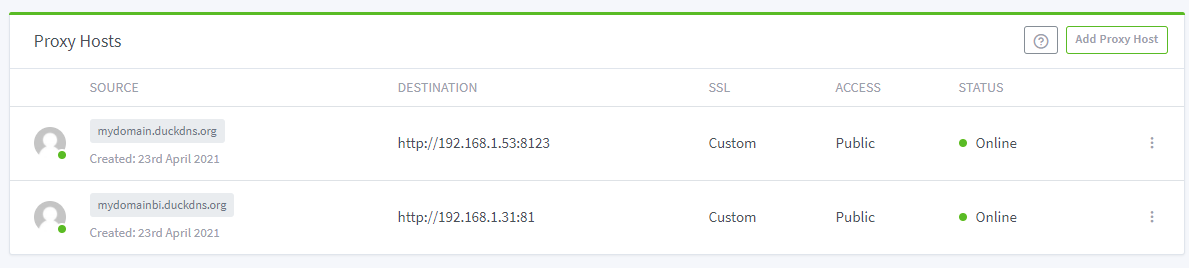
4. Next, you will need to create two hosts. One host should point "mydomain.duckdns.org" to port 8123 on your Home Assistant. The second host will point "mydomainbi.duckdns.org" to your BI server. For each host, choose the SSL cert that matches their domain names.
5. Proceed through the BI setup from the guide, but make sure to use your new DuckDNS domain name as the external URL for the BI web server.
Once you finish the BI setup, you should be able to access both HA and BI externally on your two DuckDNS domain names. This is all you need to make the iframes work.
Lovelace Config
Now you can add iframe cards to your Lovelace config, for example:
- type: iframe
  url: https://mydomainbi.duckdns.org/ui3.htm?tab=live&maximize=1&cam=driveway&group=all_cams&streamingprofile=480p
  aspect_ratio: '16:9'
A bunch of URL options are available to play with, not limited to:
- tab - which side-panel should be shown if the camera is minimized, either "live" or "clips"
- maximize - set to 1 to maximize the video and hide the sidebars
- cam - the shortname of the camera to show when maximized
- group - the camera group to show when the camera is minimized
- streamingprofile - change the quality (ex: 480p, 720p, 1080p)
Add the iframe to your config and see if it loads. You may be asked to authenticate the first time you connect. Then try turning off your wifi on your phone to see if you can see the iframe externally.
DNS Setup
The only problem now is that when you are connected to your LAN, the iframe card will still load over internet because you supplied the external web address in the config. You can confirm this by unplugging the internet from your router/modem. Once your network is no longer connected to the internet, your iframe cards will fail to load. We want to fix this so that we can view our cameras over LAN, without needing to go through the internet.
The simplest way to fix this problem is with a custom DNS record. If you do not have your own DNS server, do yourself a favor and set up a Pi-hole. I use a Pi-hole at home, so all I had to do was add a custom record to route my Blue Iris domain to my Home Assistant IP. I used my Home Assistant IP because that is the IP of my Nginx proxy.
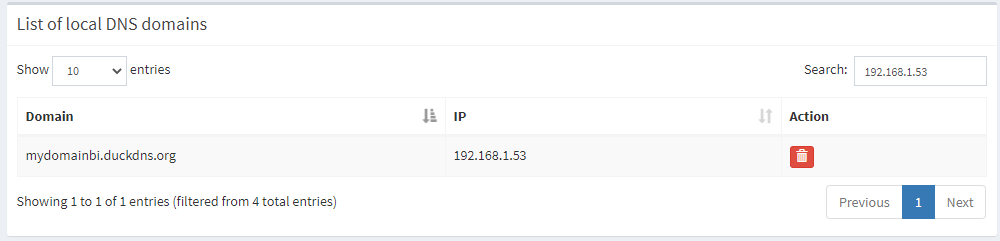
Now, all requests to my BI domain in my LAN will be routed back down to my Nginx proxy, rather than being routed out through the internet. This way I can access my cameras in my LAN even if my internet is down.
Stream Optimization (optional)
Now that we are using the UI3 player, we should see a significant reduction in bandwidth. But there is one more trick to squeeze out even more performance without sacrificing quality.
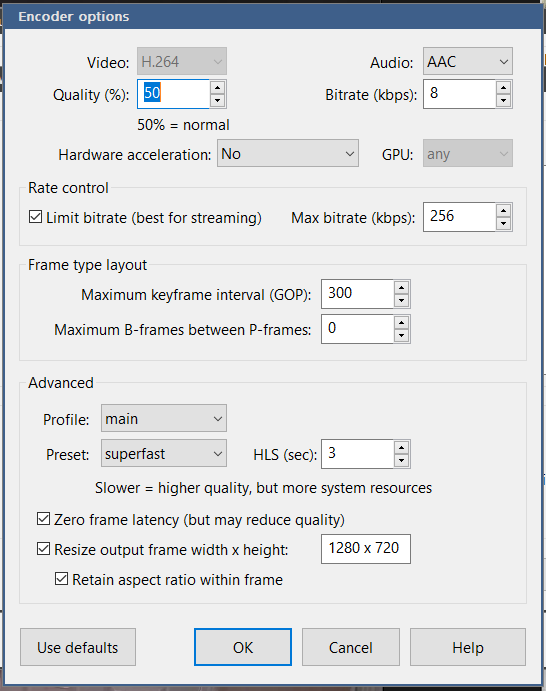
First, go to Blue Iris Settings > Web Server > Advanced and configure Steaming Profile 0. Reduce the quality and bitrate to an acceptable level and save everything. Here are the levels I used.
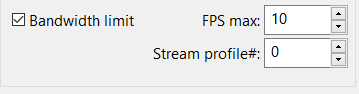
Next, go into Settings > Users and edit your user profile. Check the box to limit bandwidth and set a maximum framerate around 10-15 FPS, and choose the Streaming Profile you set up in the previous step.
Once you click OK, the changes should take effect immediately, but you may need to restart the BI service.
Now the bandwidth has been cut nearly in half while keeping the quality at an acceptable level.
Conclusion
That's it! Now I am using h264 encoding the way it was intended – low bitrate and high quality. I have fixed all of the bottlenecking in my home network, and my Lovelace cameras work better than ever.
Next, I am working on a way to show a list of BI recordings in lovelace, with direct links to launch the clips. Feel free to subscribe to my RSS or Twitter to get updates if you are interested in more features like this.
Thanks for reading!