Last Watch AI - Blue Iris Walkthrough
In this post I will walk through setting up Last Watch AI to process motion events from Blue Iris. I will show how to feed motion alerts from BI into Last Watch, and how to trigger recordings in BI if certain objects are detected.
In this post I will walk through setting up Last Watch AI to process motion events from Blue Iris. I will show how to feed motion alerts from BI into Last Watch, and how to trigger recordings in BI if certain objects are detected. Finally, I will cover some advanced features in Last Watch to further refine your AI motion events.
For more about Last Watch – Introducing: Last Watch AI
Windows Setup
This guide assumes that you already have Blue Iris set up on a Windows machine. You can install Last Watch on the same machine (simpler setup) or you can run Last Watch on a separate Linux server (better performance). If you want to use Linux, just skip ahead to the next section.
1. Install Docker (required)
The first step is to install Docker for Windows. Docker is a virtualization environment where Last Watch will be hosted.
2. Install Docker Compose (required)
Docker Compose is a tool for defining and running multi-container applications such as Last Watch. You will use Docker Compose to start and stop the application.
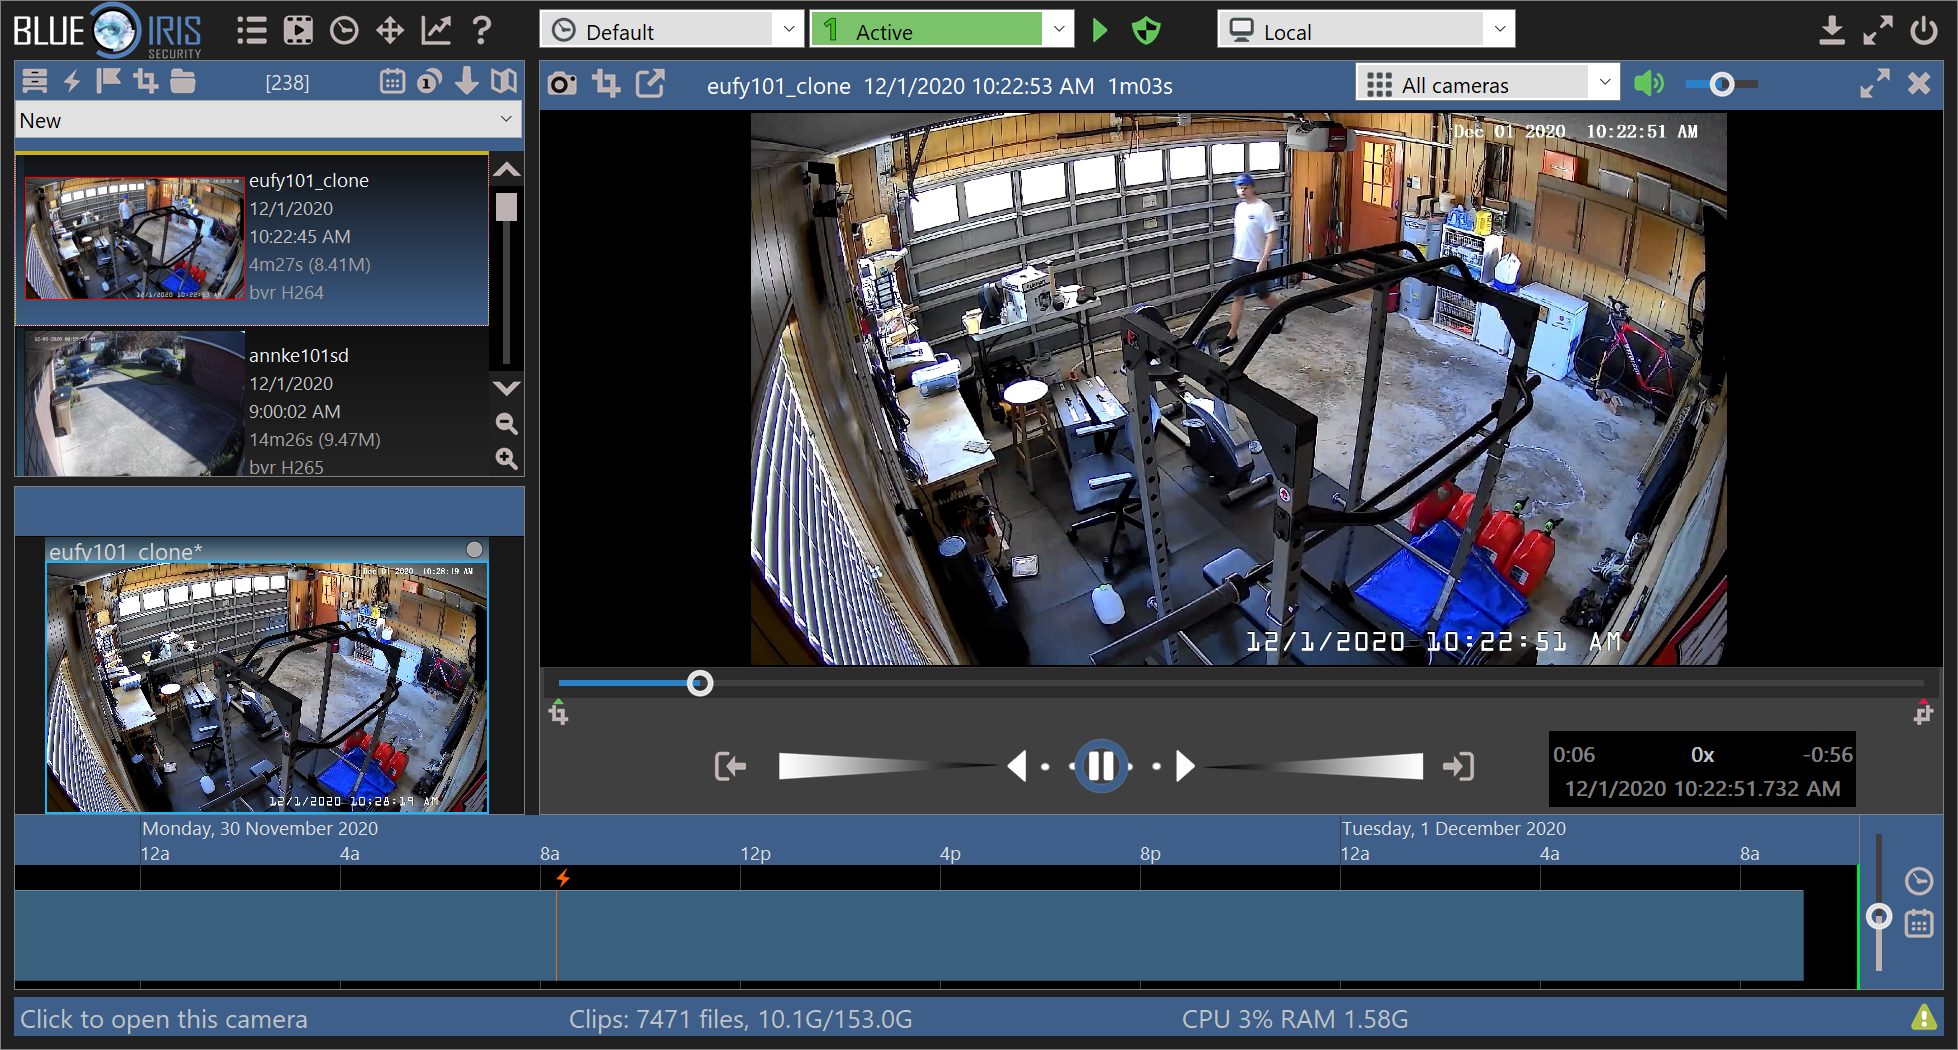
3. Download and un-zip Last Watch (required)
- Download the latest release zip (last-watch-ai-x.x.x.zip) from Github: https://github.com/akmolina28/last-watch-ai/releases
- Extract the zipped folder to the installation directory of your choice. Usually this would be somewhere on the main OS drive. In my case I will extract directly to the C drive. You should end up with a folder that looks like this:
4. Configuration (required)
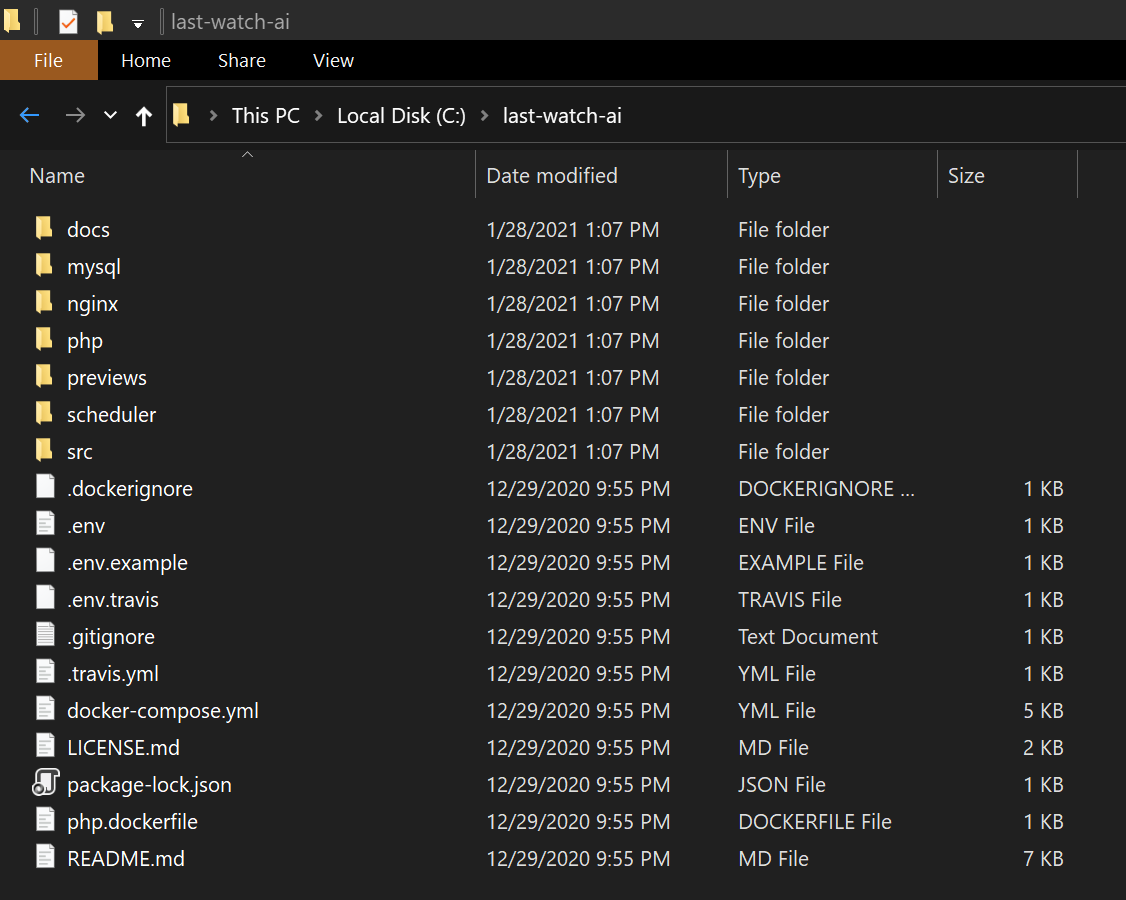
Next, create your watch folder. This is where Last Watch will check for new image files, and where BI will send its motion alert snapshots. For this example I will create the folder C:\aiinput.
Now, navigate to the application folder that you just un-zipped and edit the file called .env using notepad or an editor of your choice. Set the WATCH_FOLDER to the path of the folder you created in this step. Familiarize yourself with other settings that you may wish to change in the future.
5. Start the app
Last Watch is started and stopped via the command line.
- Open a new command prompt (Win+R, then type "cmd")
2. Change directory (cd) to the folder you extracted in step 3. This folder should contain a file called docker-compose.yaml
> cd c:/last-watch-ai
3. Run Docker Compose to bring up the containers
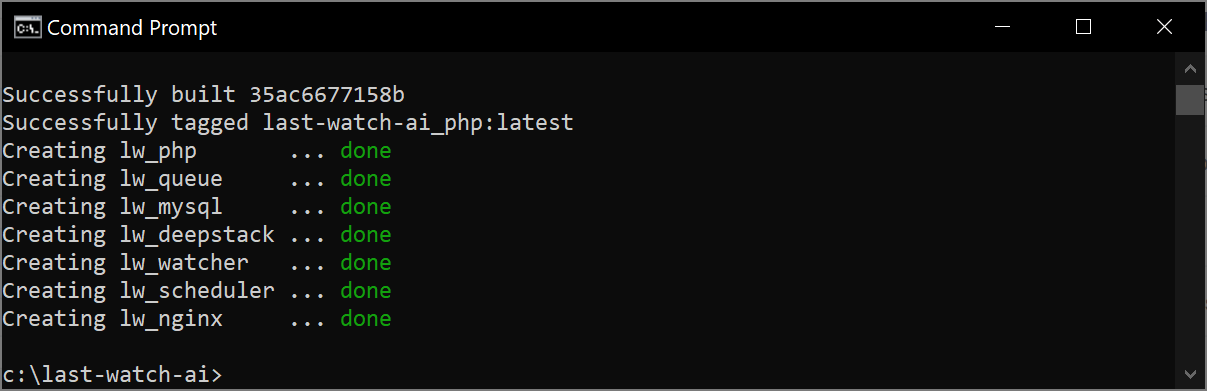
> docker-compose up -d --build site
This command will take a few minutes to run the first time. Docker will pull images for all of the containers that make up Last Watch, including Deepstack. Once the containers are up you should see output that looks like this:
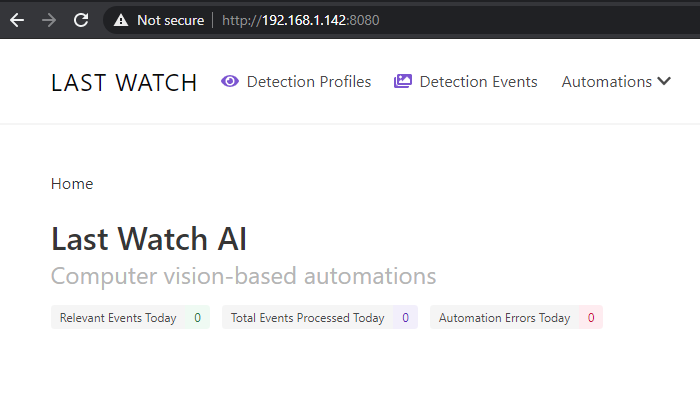
4. Open a browser and navigate to http://localhost:8080
You should be greeted with an empty landing page that looks like this:
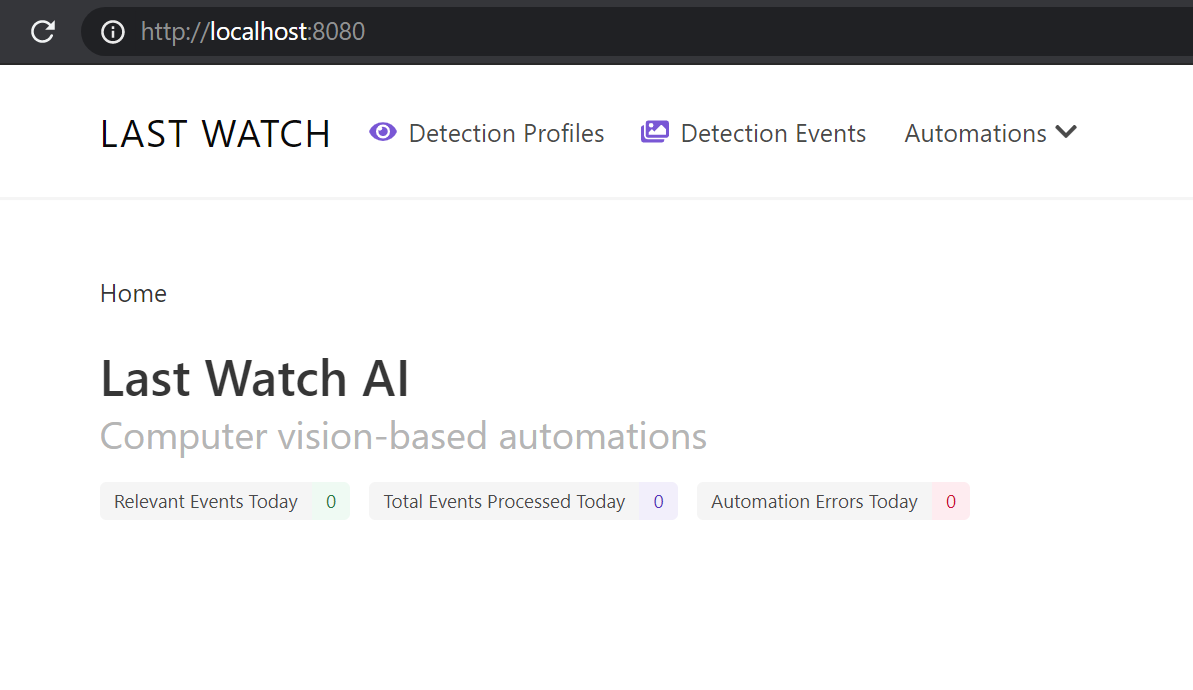
At this point, Last Watch is running and is ready to start processing image files. You can test by dropping an image into the watch folder and checking the Detection Events feed for the new event. Otherwise, you can skip down to the Blue Iris setup below.
Ubuntu Setup
Linux is the preferred environment for Last Watch, but the setup a bit less convenient for most Blue Iris users. Not only do you need to install Last Watch, but you also need to set up a share for Blue Iris to write images to. In this example I will show how I set up Last Watch on my own Ubuntu server. This is how I run my own setup at home.
This guide assumes a fresh install of Ubuntu. Some of these steps may not be required if you are working from an existing server.
1. Create a Sudo User
On a fresh Ubuntu install, the first task is to set up a sudo user so that you aren't running as root.
> apt-get update

> apt-get upgrade

> adduser lastwatch

> usermod -aG sudo lastwatch

> su - lastwatchNow you are logged in as a non-root user and can continue with the rest of the install.
2. Install Docker and Docker Compose
Last Watch runs in docker containers so this dependency needs to be set up first. Rather than copy/paste the commands from the Docker docs, I'll just link them here:
- Install Docker Engine - https://docs.docker.com/engine/install/ubuntu/
- Install Docker Compose - https://docs.docker.com/compose/install/
3. Clone Last Watch source code
Clone latest source code for Last Watch to your home directory. This will create a directory in your home called last-watch-ai.
> cd ~

> git clone https://github.com/akmolina28/last-watch-ai.git
4. Configuration (important)
Next, set up a directory for the watch folder. We will configure Last Watch to watch for new images in this directory.
> mkdir ~/aiinputNow, navigate to the application directory and set up the configuration file.
> cd ~/last-watch-ai

> cp .env.example .env

> nano .env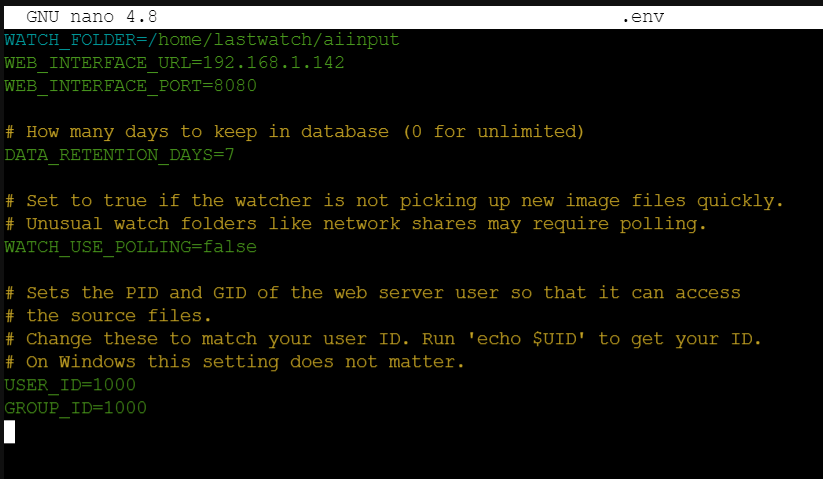
Set WATCH_FOLDER to the path of the directory we just created, and set WEB_INTERFACE_URL to the address of your server. Check the rest of the settings and change them as desired.
5. Build the application
Now that everything is set up, you can build the app using the command below. This command will install dependencies, set up the database, and compile the code for use. Pulling in dependencies may take a few minutes.
> cp src/.env.example src/.env &&
sudo docker-compose up -d mysql &&
sudo docker-compose run --rm composer install --optimize-autoloader --no-dev &&
sudo docker-compose run --rm artisan route:cache &&
sudo docker-compose run --rm artisan key:generate --force &&
sudo docker-compose run --rm artisan storage:link &&
sudo docker-compose run --rm artisan migrate --force &&
sudo docker-compose run --rm npm install --verbose &&
sudo docker-compose run --rm npm run prod --verbose6. Start the app
Finally, bring up the application by starting the containers. Again, it may take a few minutes to pull in dependencies.
sudo docker-compose up -d --build siteNow you can confirm that the app is up by using a web browser to navigate to the IP and Port configured on the server.
7. Make the watch folder shareable
The last step is to make the watch folder accessible to your Blue Iris server. Here is how you can expose the folder as a Samba share.
1. Install Samba.
> sudo apt install samba2. Set up a username and password.
> sudo smbpasswd -a lastwatch3. Edit the Samba configuration to set up the watch folder as a share.
> sudo nano /etc/samba/smb.confAt the very end of the file, add the following configuration for the watch folder and user set up in the previous steps:
[aiinput]
comment = Last Watch AI input
path = /home/lastwatch/aiinput
valid users = lastwatch
browsable = yes
read only = no
guest ok = no
4. Finally, restart the Samba service to apply the settings.
> sudo service smbd restart8. Map the Samba share on your Blue Iris PC
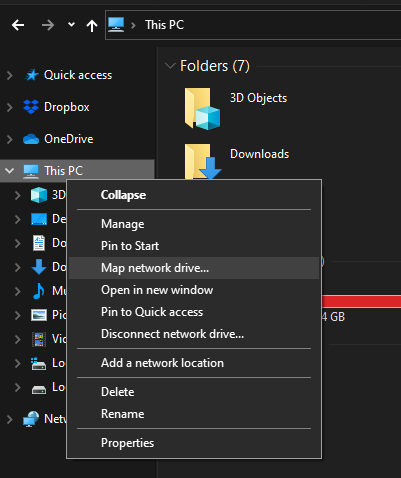
Now you can map the Samba share as a network drive on your Blue Iris PC. This will allow you to save the credentials in Windows and use the share as an output folder in Blue Iris.
Open a new Explorer window, right click on This PC and choose Map network drive.
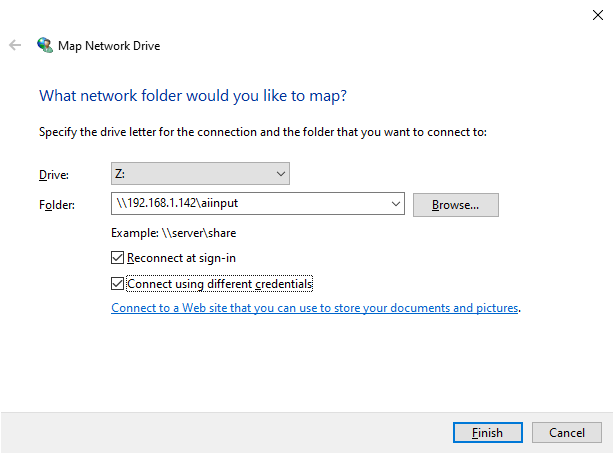
Enter the the IP and name of your share as shown below. Make sure to check Reconnect at sign-in and Connect using different credentials. This will ensure that BI always has access to the folder.
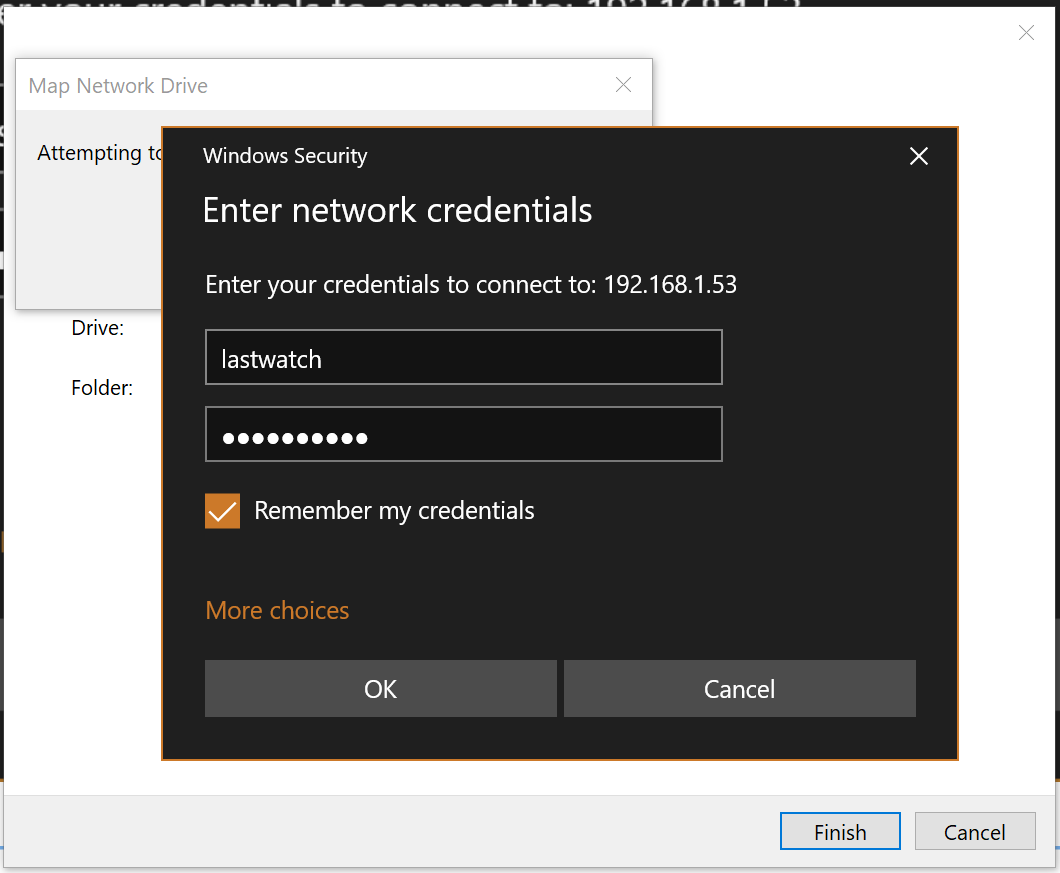
Click finish and enter the credentials you used to set up Samba. Make sure to check Remember my credentials.
Now you can start configuring Blue Iris.
Blue Iris Setup
At this point we have installed Last Watch either on the Windows PC or on a separate Linux server. Now, I will walk through setting up a camera in BI to leverage the AI detection in Last Watch. The goal is to set up our camera so that it only records clips when a motion event is set off by a relevant object.
This part of the guide assumes you already have a camera set up in BI.
First, we need to set up the watch folder as an output folder in Blue Iris. In the main settings menu, go to Clips and archiving.
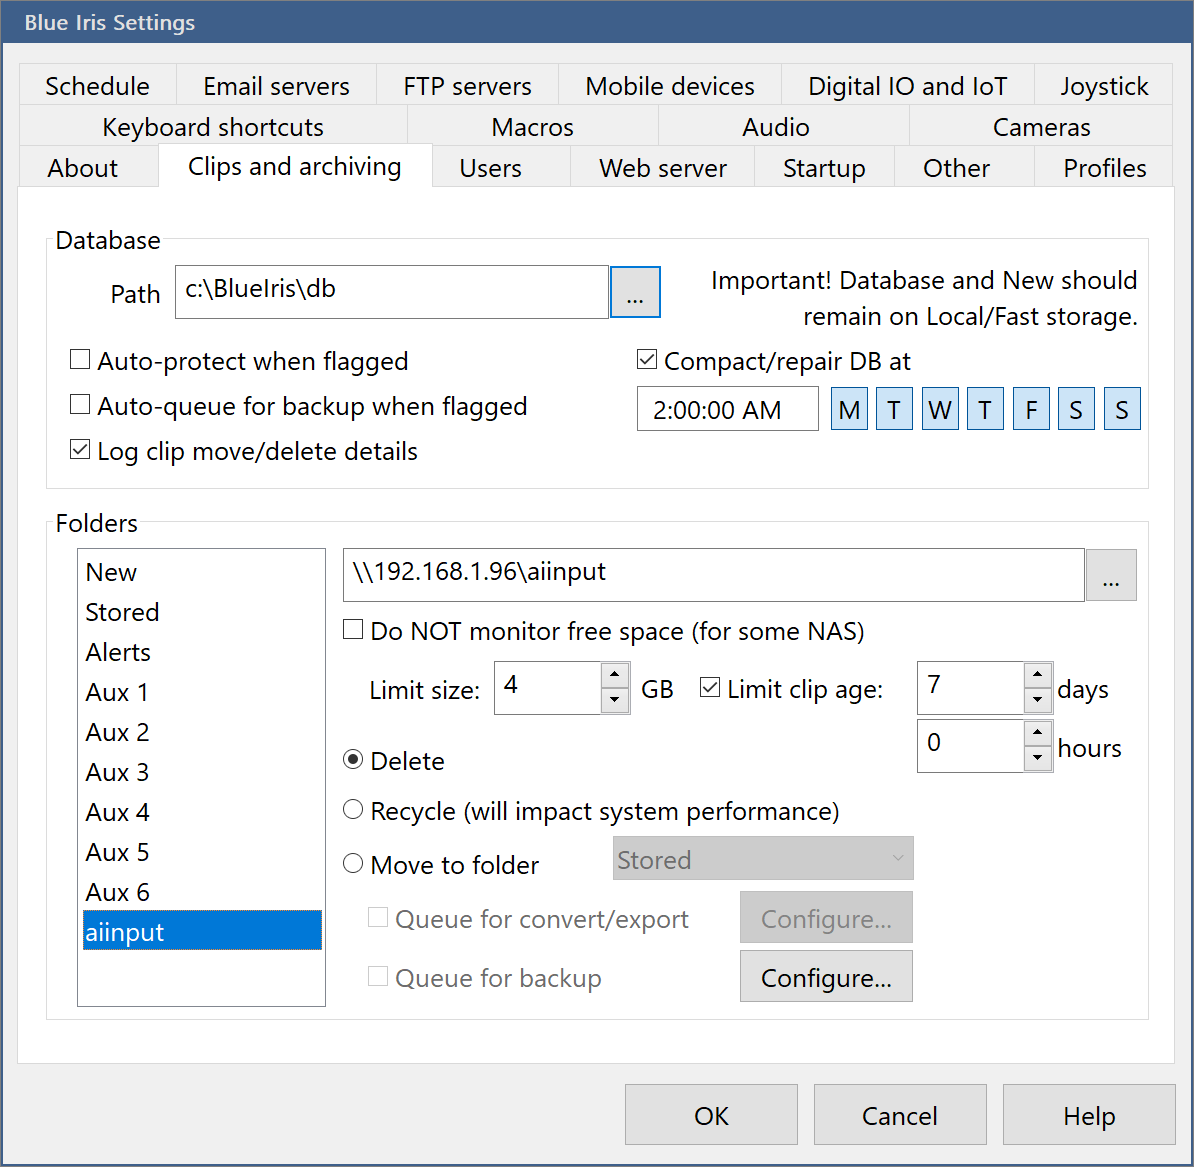
Choose one of your unused Aux folders and rename it to aiinput. Set the path to your watch folder. If you installed on Windows your path would be something like "C:\aiinput". If you installed on Linux, provide the path to the Samba share.
Next, open the settings for your camera and open the Trigger tab. Tick the box for Motion sensor. Configure the motion sensor settings as desired. Set the break time to 30 seconds.
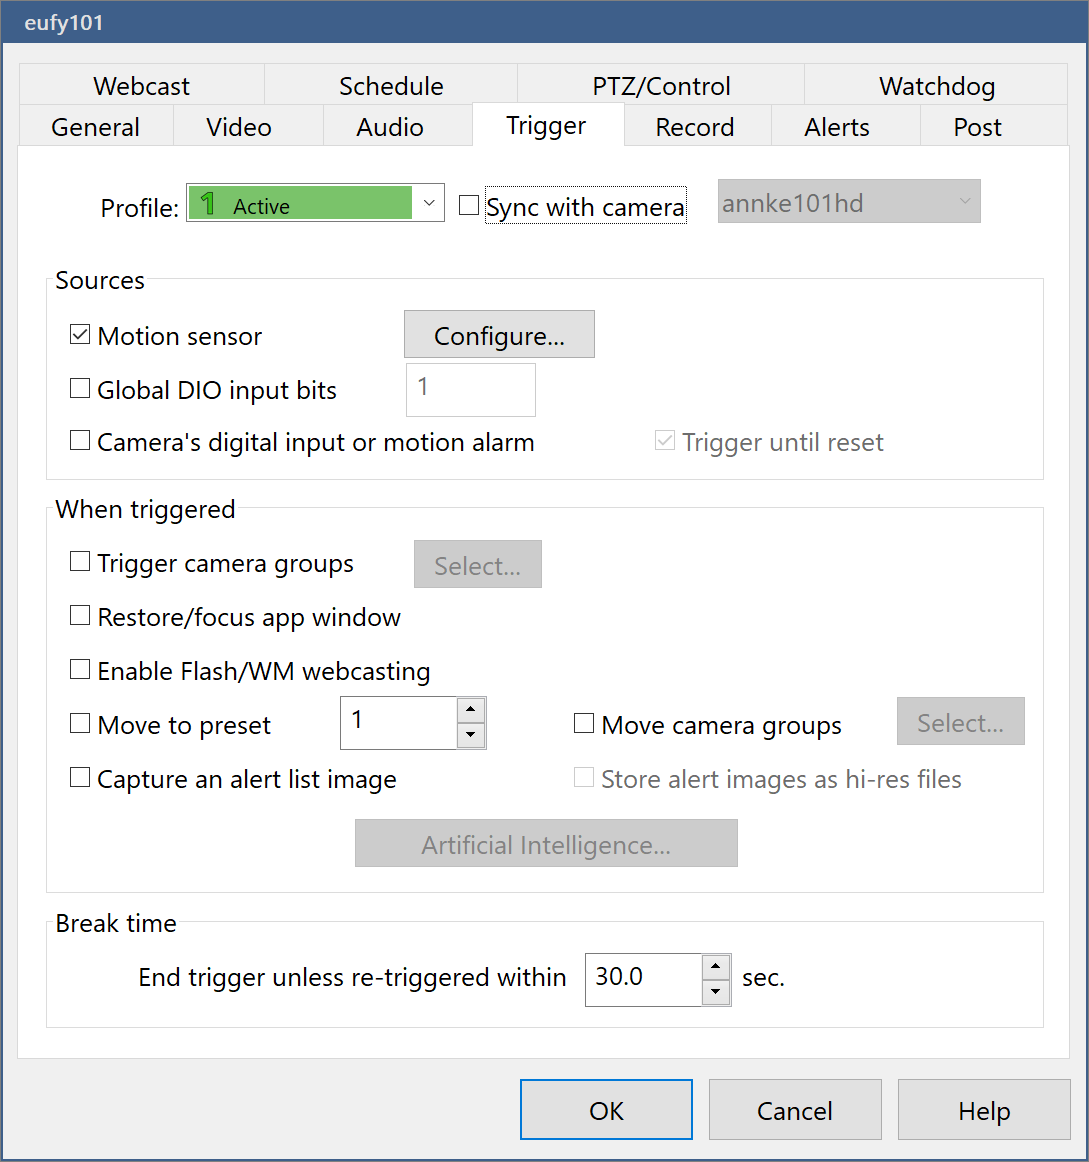
Next, go to the Record tab and set the camera to save a JPEG snapshot to the aiinput folder when triggered.

The settings above tell the camera to trigger whenever there is motion. The trigger will last 30 seconds, or longer if there is more motion. During the trigger, BI will save snapshots to the aiinput folder every 5 seconds. Note that the camera is not set to record video when triggered – this is because I want Last Watch to decide if a recording should start.
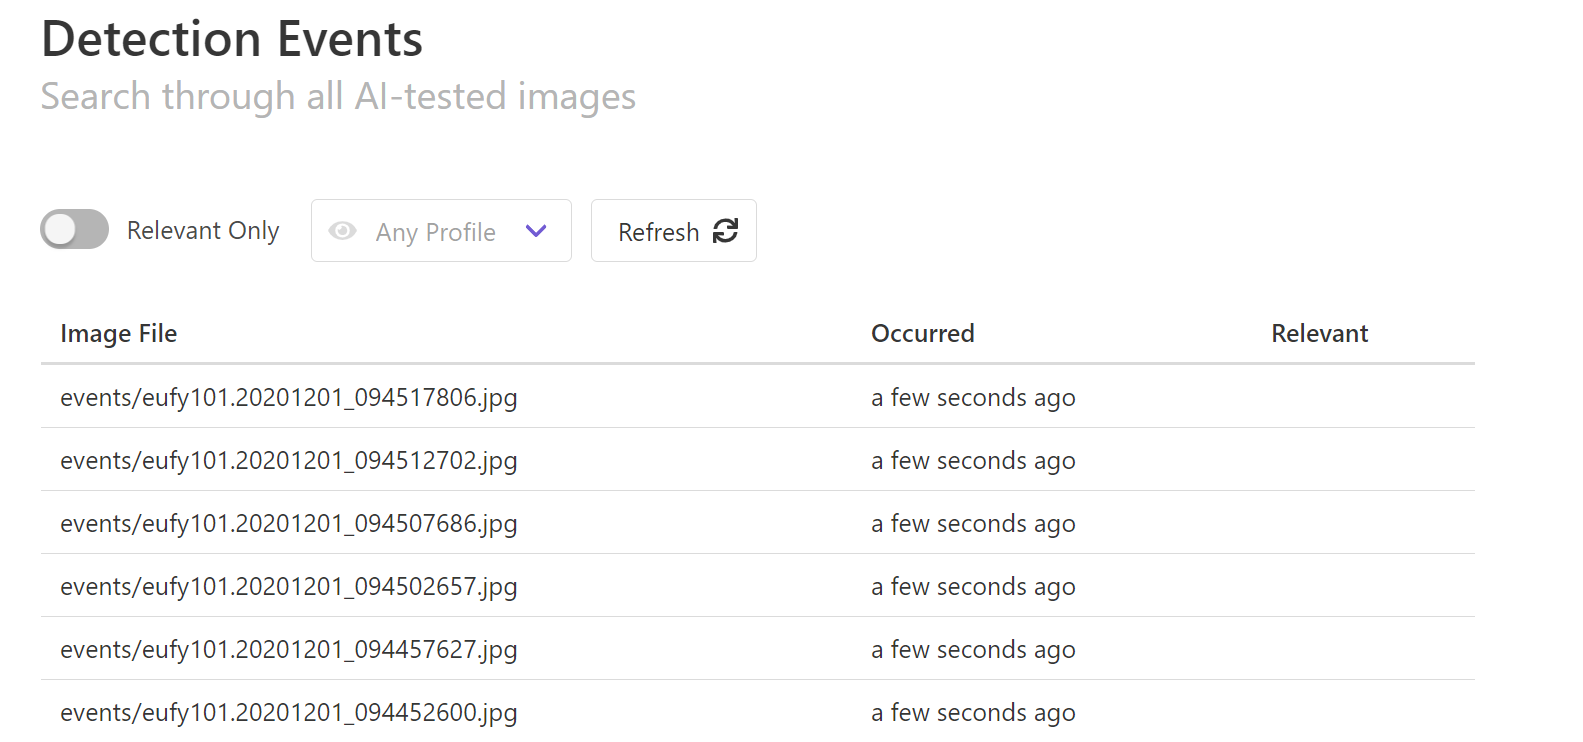
If everything is working, you should see motion alert snapshots feeding in to Last Watch. Note that the events will not be Relevant because we have not set up a detection profile yet.
Before we set up the detection profile in Last Watch, we need to set up one more thing in BI. Right now, our camera is set to trigger on motion and create snapshots. But we also need a way to trigger a video recordings from Last Watch.
The only way to do this currently in BI is to create a clone of the camera with its own trigger and record settings. You can do this easily by adding a new camera and copying the settings from your existing camera.
Note: some cameras provide multiple streams – usually a full HD stream and a lower resolution sub-stream. If your camera supports sub-streams, you don't need a clone! Just use the sub-stream for your snapshot camera, and the main stream for your video recordings.
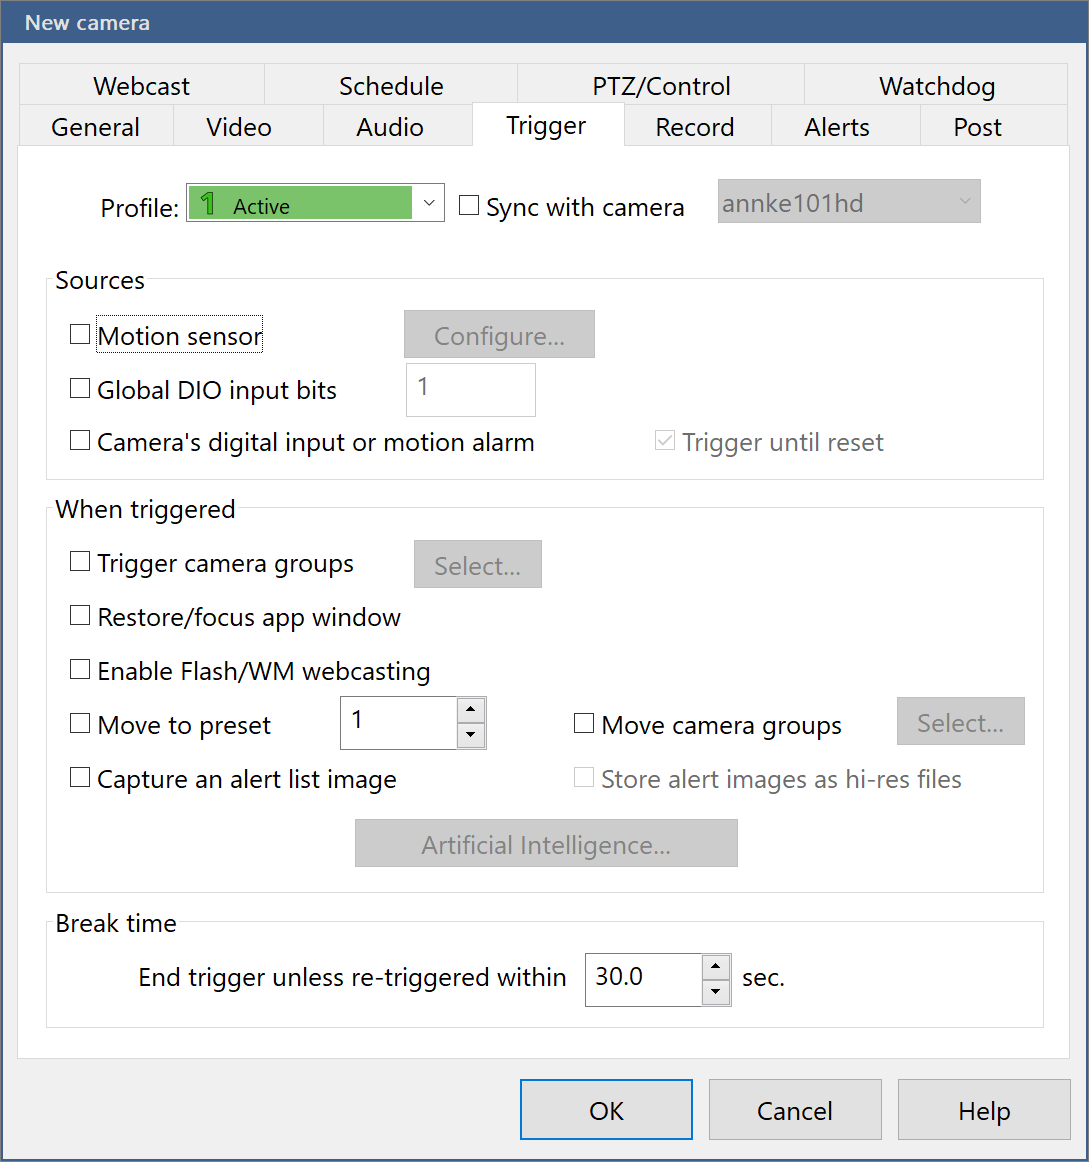
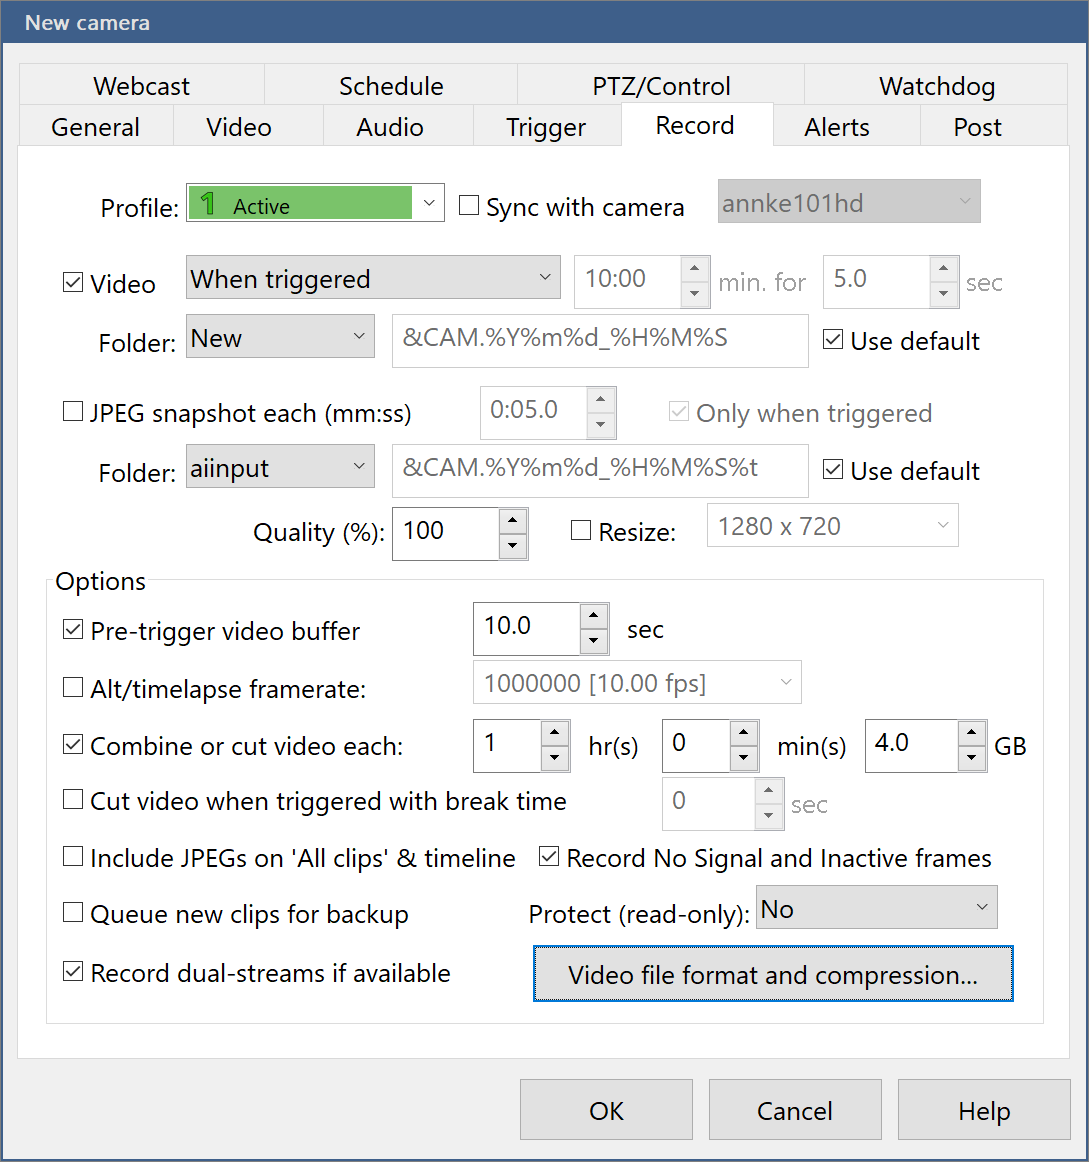
The clone has motion disabled and is set to record video when triggered. The trigger in this case will come from Last Watch. I also added a 10 second buffer to account for some delay in the AI detection.
Last Watch Automation
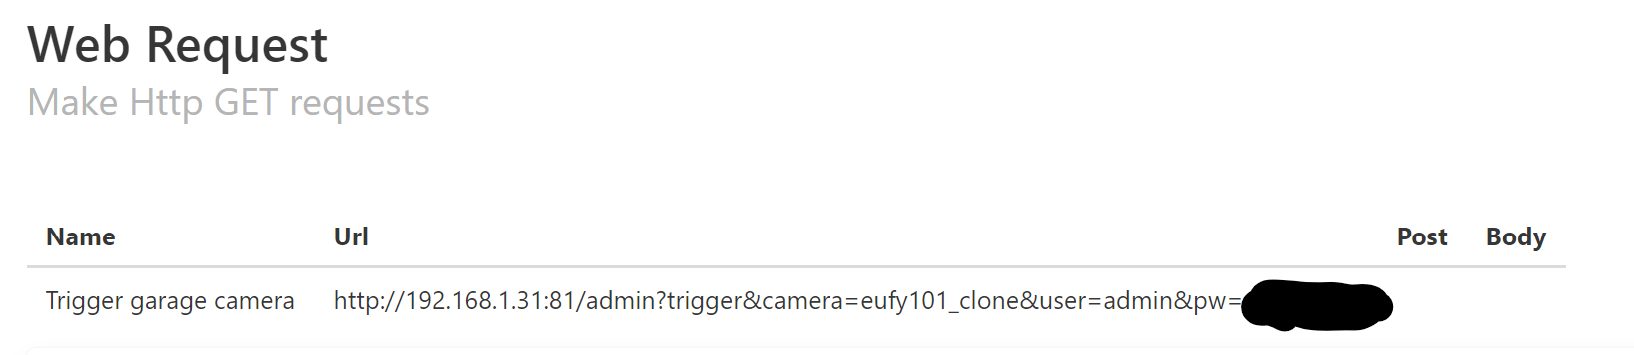
At this point, BI is set up to feed motion alerts into Last Watch, and BI has a camera clone that is ready to be triggered by Last Watch. The final step is to set up a Detection Profile and configure the Web Request Automation in Last Watch.
Last Watch will trigger recordings using a Web Request. Go to the Web Request Automations page to set up a new automation to trigger your camera. You can use the trigger URL below as a template, filling in the details of your BI setup. Note that you must enable the web server in BI for this to work.
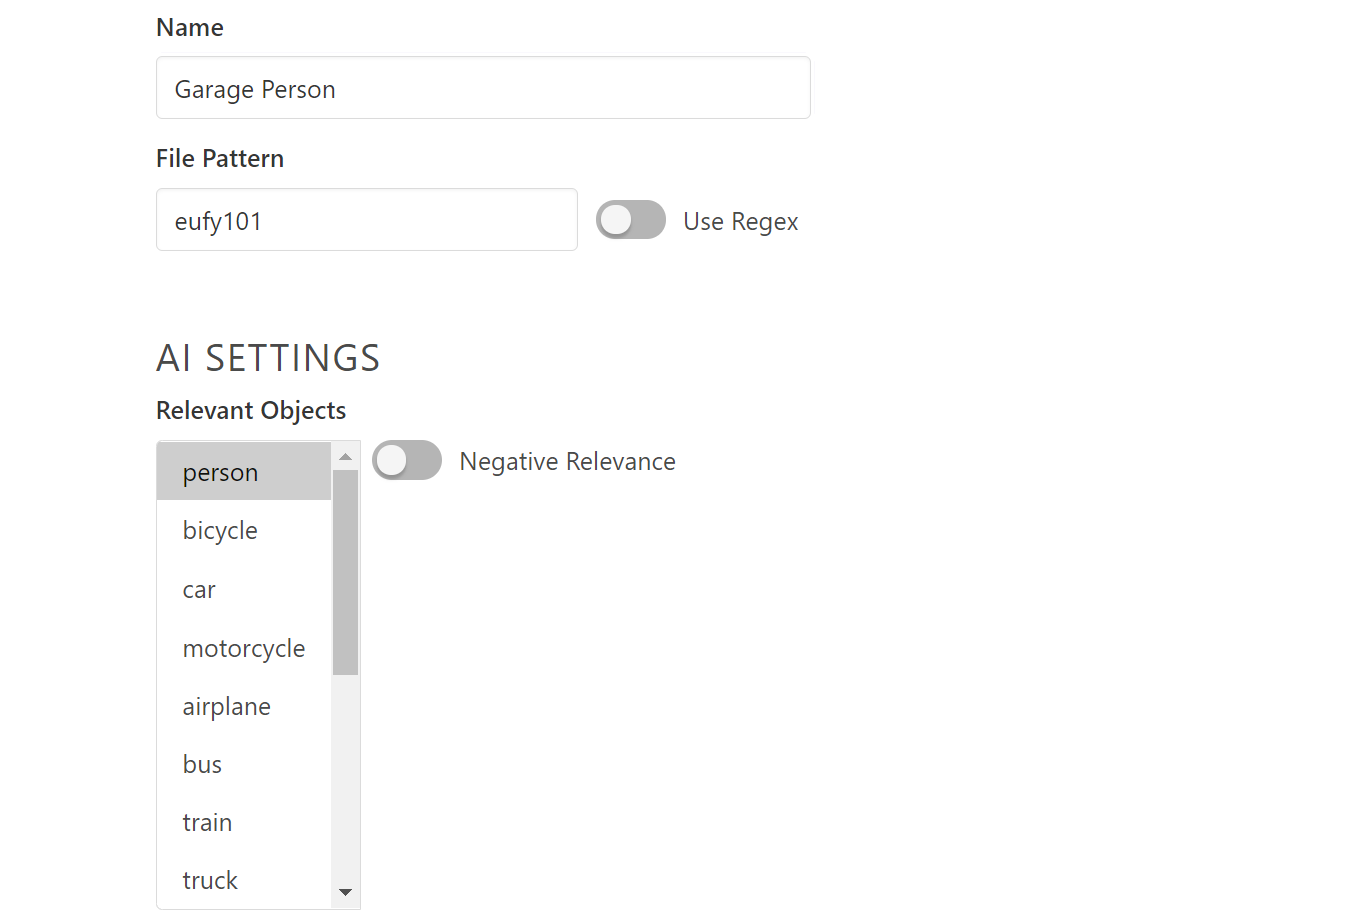
Now we can create a Detection Profile to watch for images from our camera. Enter the camera name as the file pattern and select the types of objects should trigger recordings. The rest of the profile settings aren't important right now.
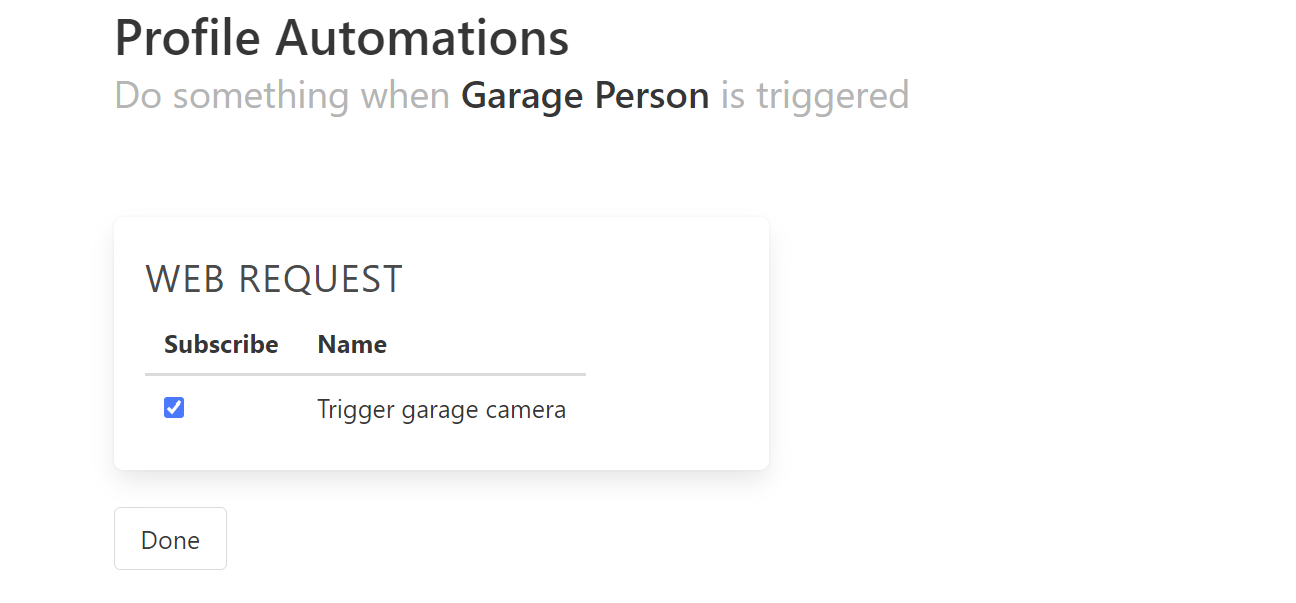
After you save the profile, subscribe it to the Web Request automation.
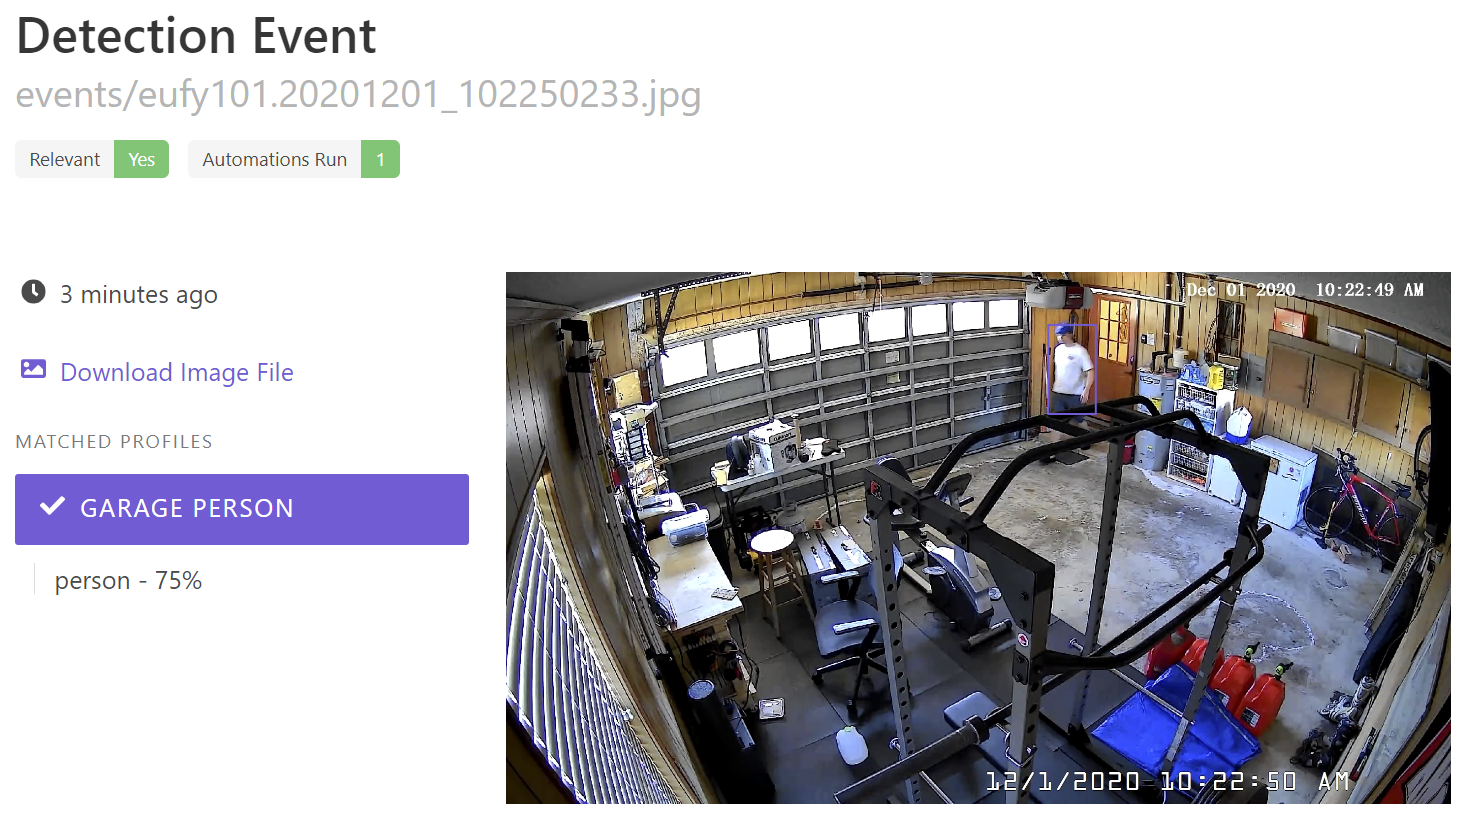
Now you can test the whole end-to-end integration by walking around in front of your camera. You should start to see Relevant Detection Events rolling in.
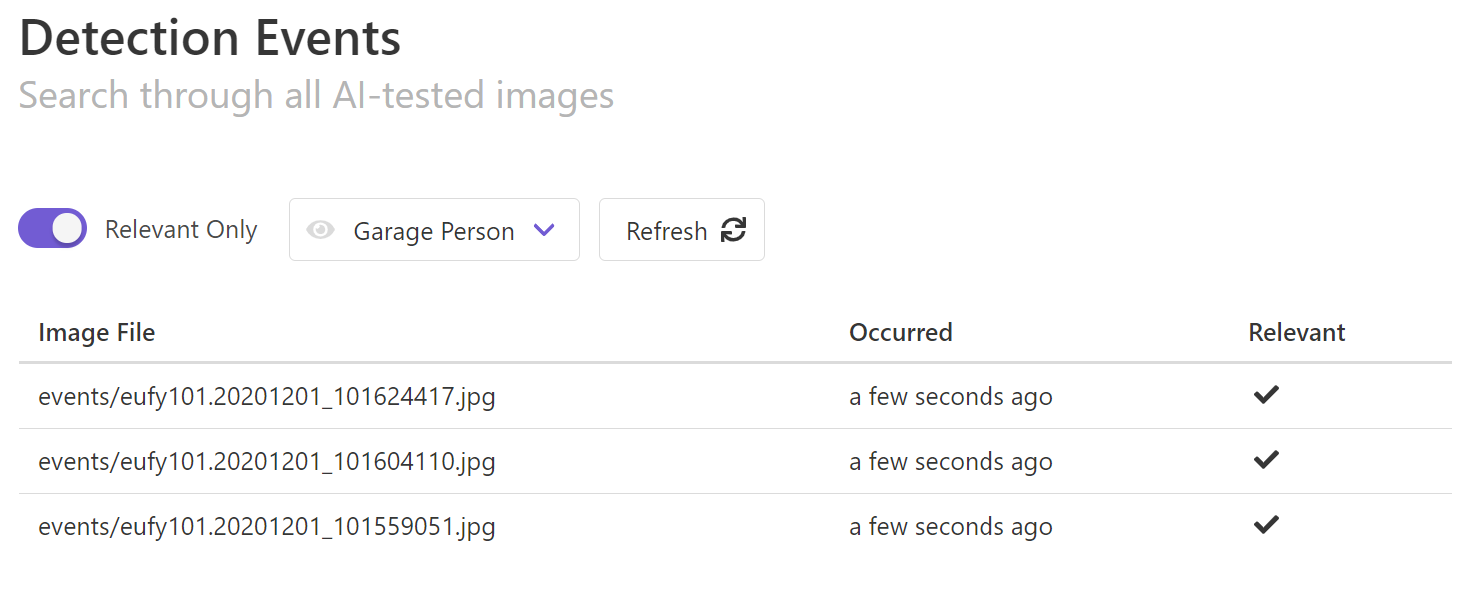
You can click on each event to open up the details and see the results of the detection and check if the automation ran.
You should also see clips populating in Blue Iris.

You will want to check the clips to see how well they line up with the detection events. You may need to adjust your pre-record buffer if the recording starts too late or too soon.
The integration is now working, but over time you will want to optimize some settings:
- Adjust the motion tolerance in BI to minimize the number of irrelevant events in LW
- Adjust the pre-record buffer, trigger duration, and snapshot interval to improve the precision of your recordings
- Adjust the AI confidence to reduce false positives
Don't forget to explore the other Automations available in Last Watch. You can set up Telegram to send images as notifications to your phone. If you are into Home Automation, you can use Mqtt or Web Requests to set up custom sensors and much more.
If you encounter any issues, please check the issues page on Github and create a new issue if you can't resolve it on your own.
Thanks for reading!