Fully Offline Video Doorbell for Home Assistant
Today I am sharing my setup for a fully offline video doorbell in Home Assistant. The camera, motion sensor, and doorbell are all integrated over local IP.

Today I am sharing my setup for a fully offline video doorbell in Home Assistant. The live video feed, motion sensor, and doorbell button are all integrated into Home Assistant over local IP. This allows me to view the feed and create automations, securely, without exposing my camera to the outside world and without relying on a cloud-connected service.
The Doorbell
I am using an Amcrest AD110 video doorbell, which is based around a Dahua camera.

The Amcrest has two critical features for the offline build. First, it has an RTSP feed for recording locally with home NVR software. Second, it has a local API to get motion sensor and doorbell events.
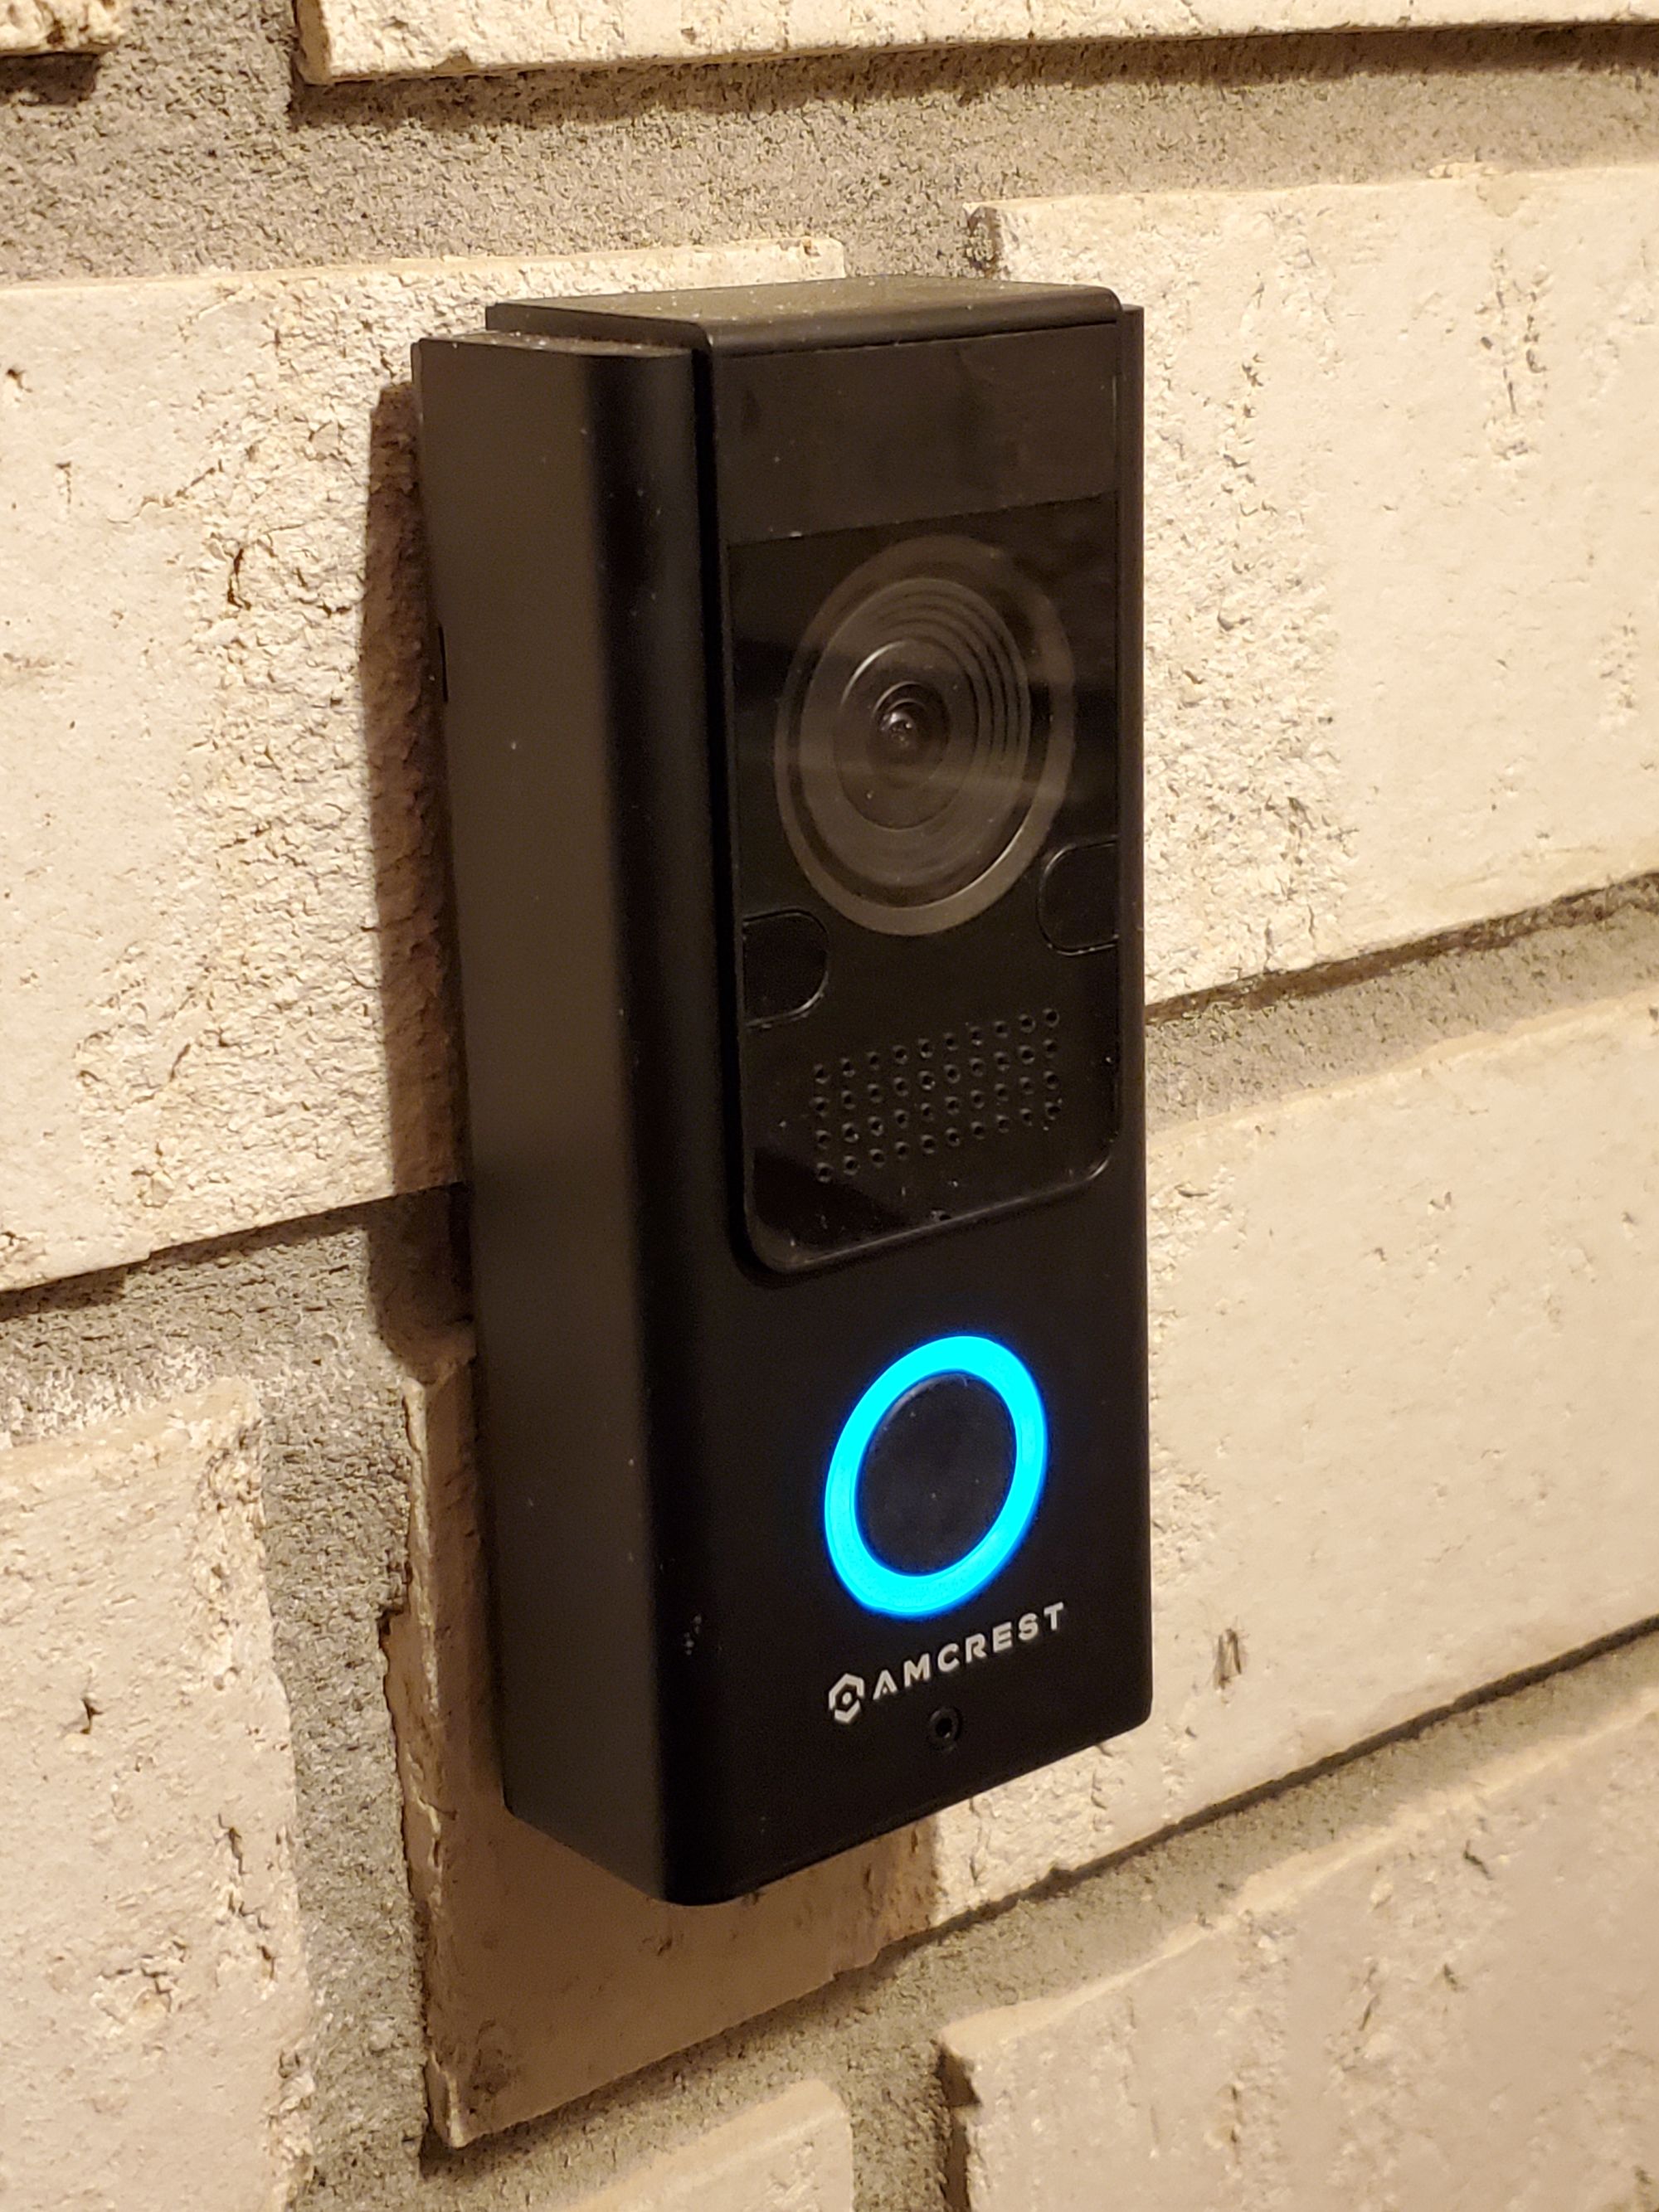
I installed the AD110 over my existing doorbell according to the manufacturer, using the official Amcrest app to set everything up. The installation was no different from any other video doorbell.
24/7 Recording and Live Monitoring
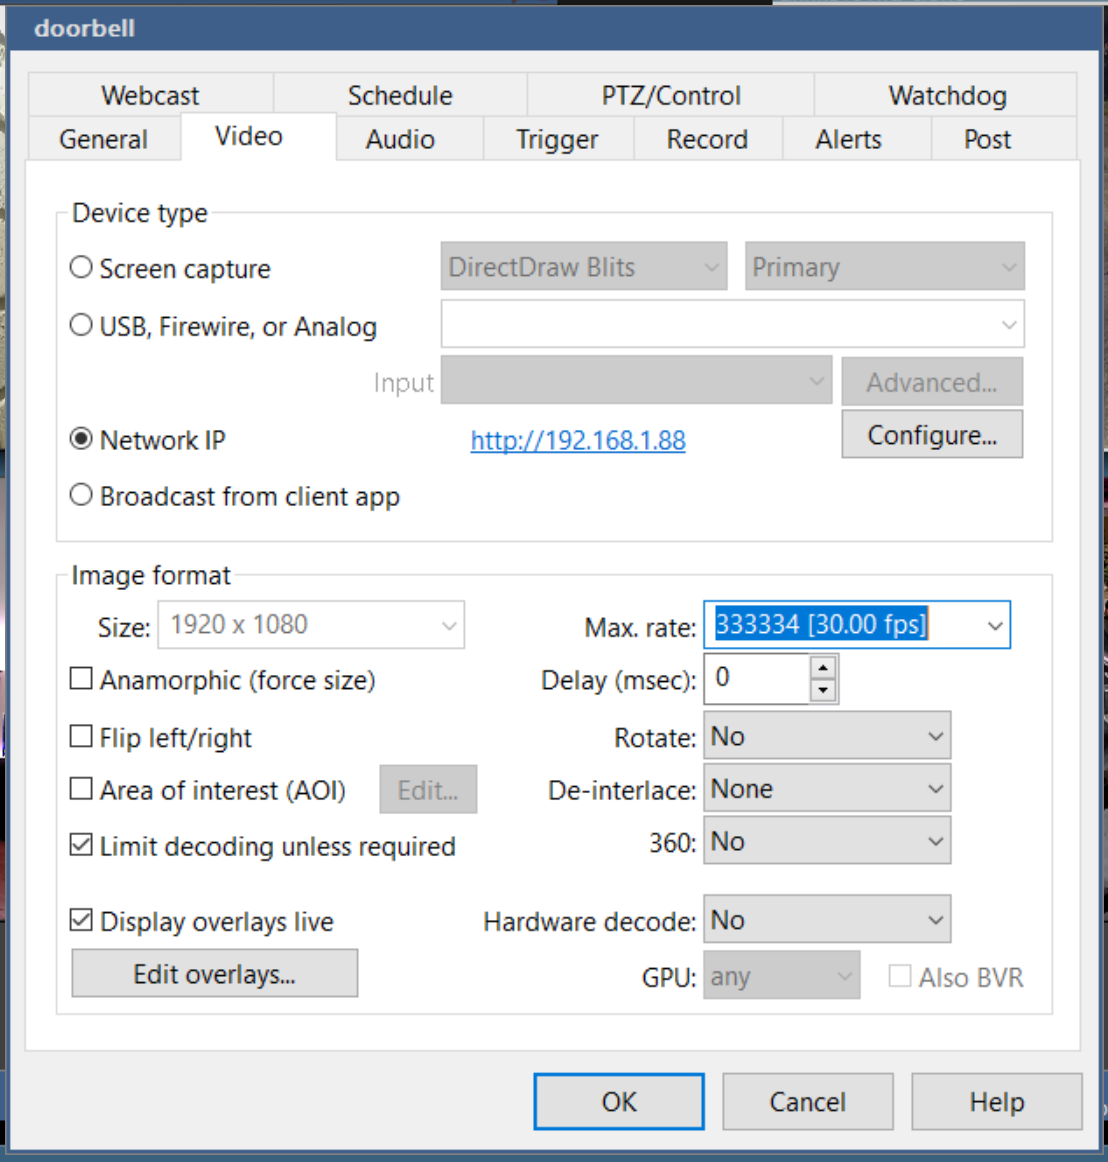
The AD110 exposes its RTSP stream by default, so the first thing I did was wire it up in Blue Iris. I use Blue Iris to record and monitor all of my home security cameras.
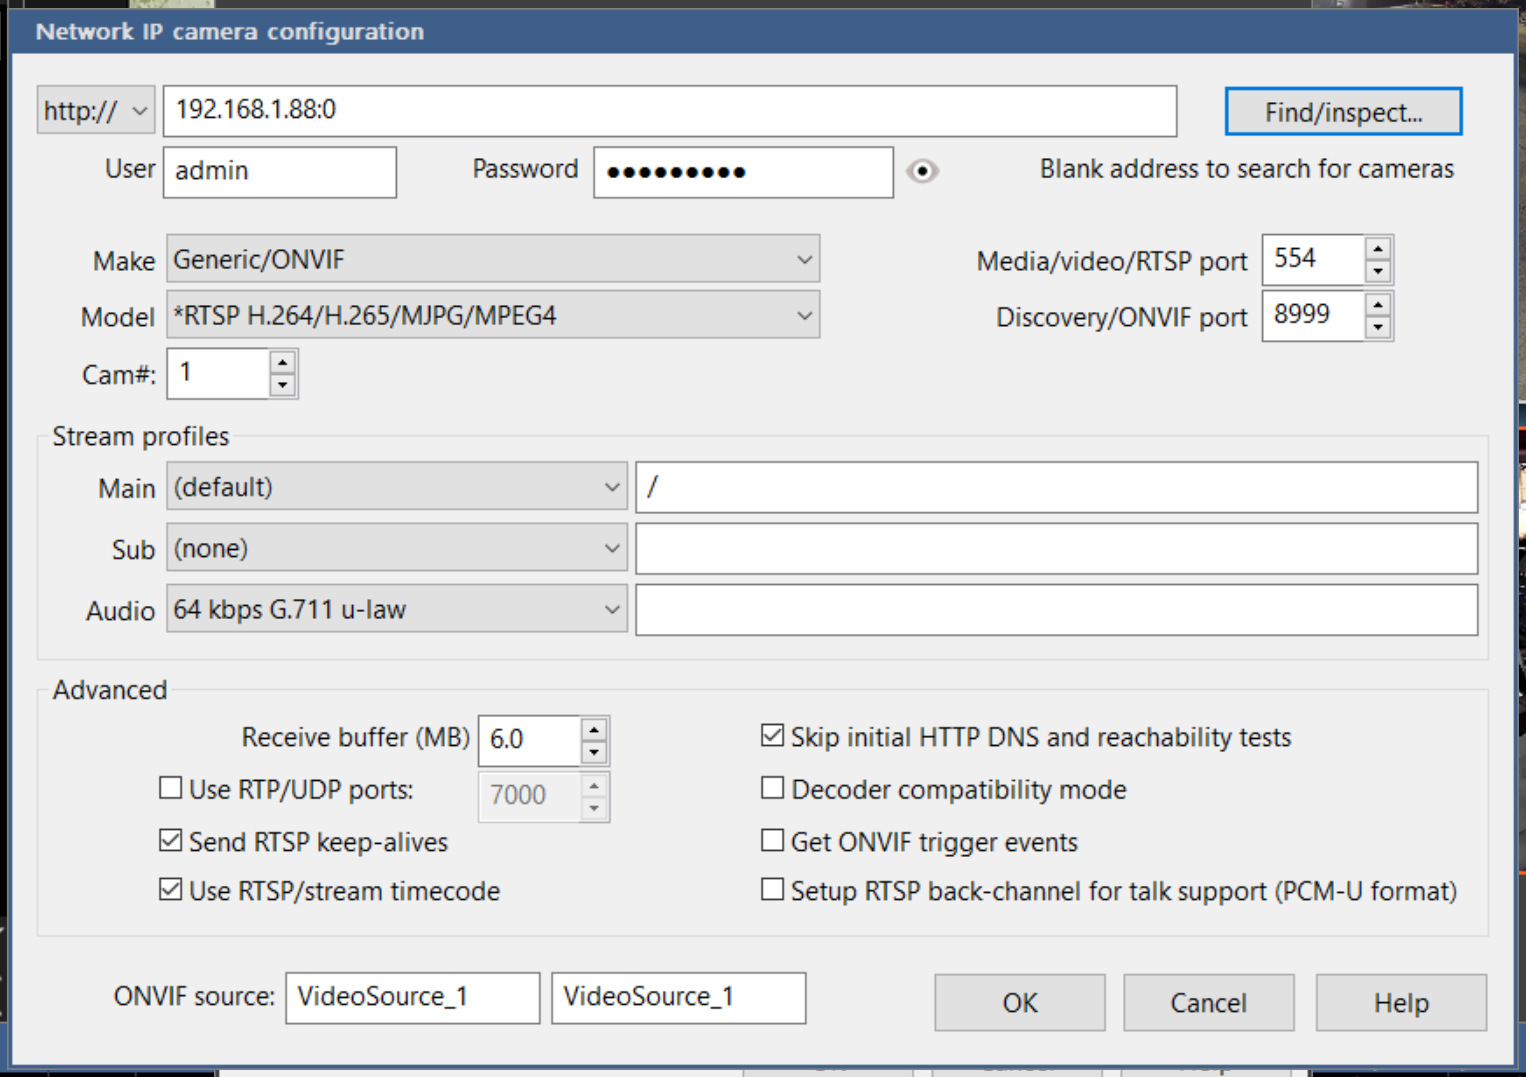
To add the camera, just enter the rstp address using the doorbell's IP, and enter the username and password from the Amcrest app. The Find/inspect button will fill in the rest of the details.
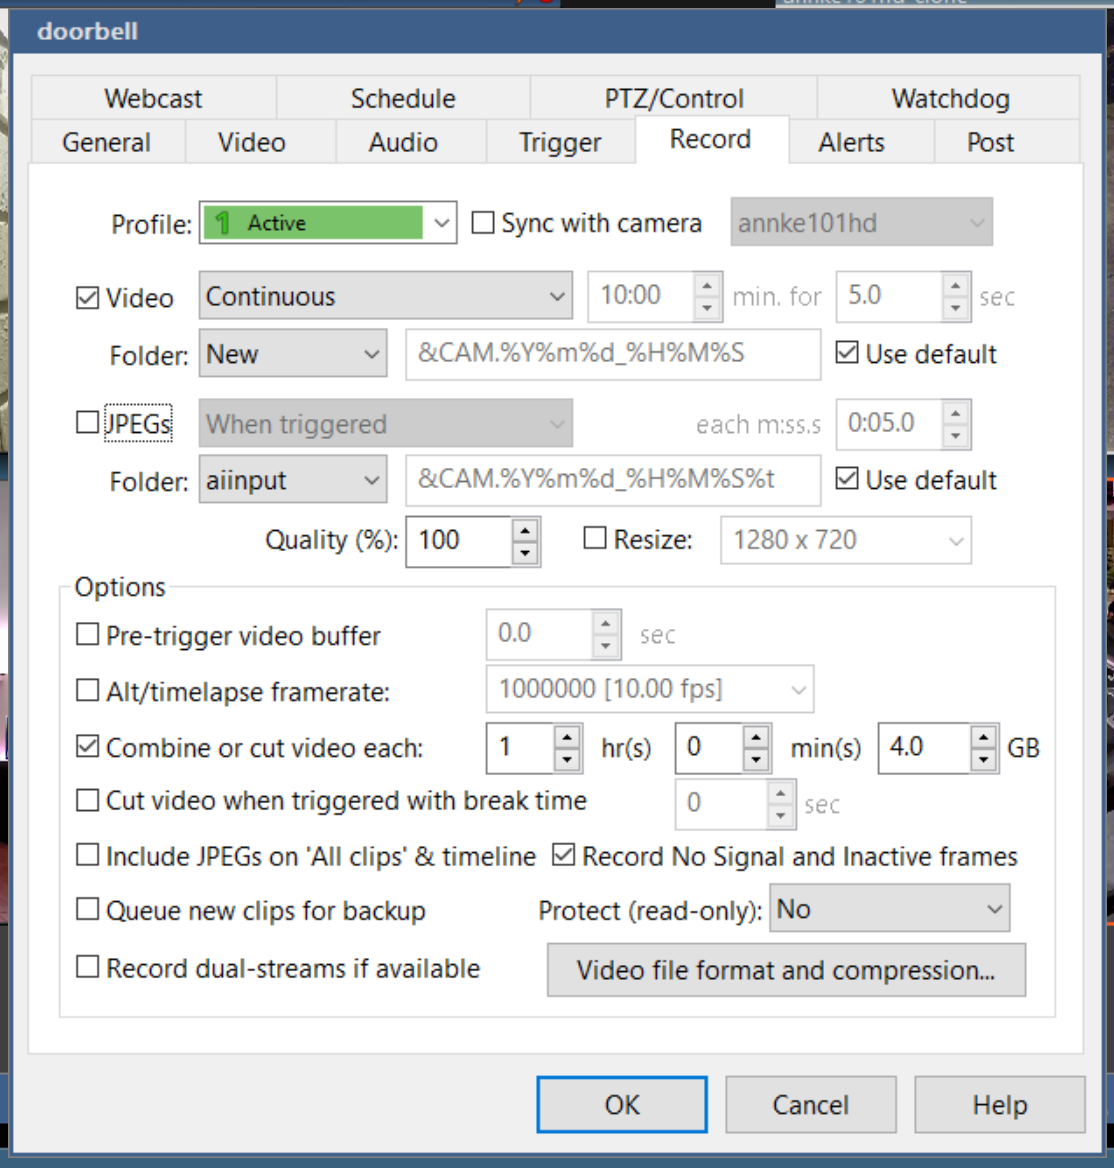
On the Record tab, tick Video and select Continuous recording. Under "video file format and compression", choose Direct-to-disc (again, this is to reduce CPU usage).
Now the AD110's video feed is continuously recording in Blue Iris completely over local IP. I can also securely view the live feed from anywhere using UI3 web player from BI.
Doorbell and Motion Sensors
Next, I set up my sensors in Home Assistant. Using dchesterton/amcrest2mqtt, you can easily generate MQTT sensors for the doorbell button and motion sensor. This all works over local IP using the Amcrest python module to access the Dahua API.
If you have not previously set up MQTT, follow this guide to set up your broker. Also, make sure your configuration.yaml contains "mqtt:" to enable device discovery.
amcrest2mqtt is a Docker image, so we will install Portainer in Home Assistant to run it.
1. Install Portainer
Install the Portainer add-on and start it up. Once it is running, open the web UI.
2. Add the Container
Select the primary endpoint. In the side menu, select Containers. Use the +Add Container button to add a new container.
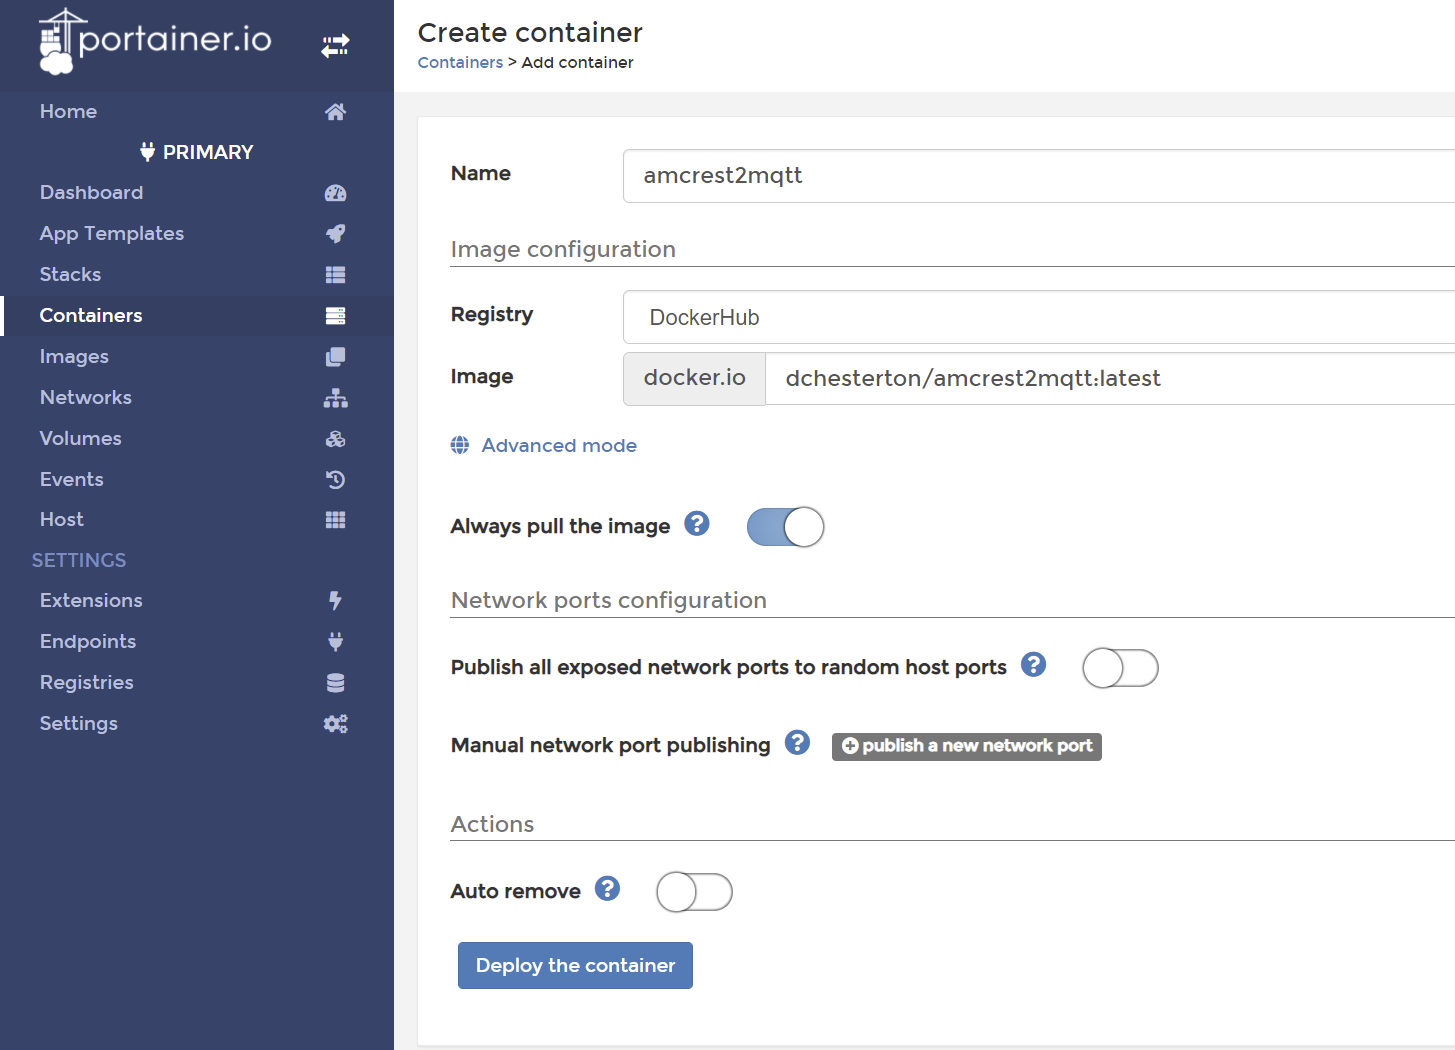
For Name enter amcrest2mqtt and for Image enter dchesterton/amcrest2mqtt:latest. Under Advanced > Env add the environment variables specified in the README.
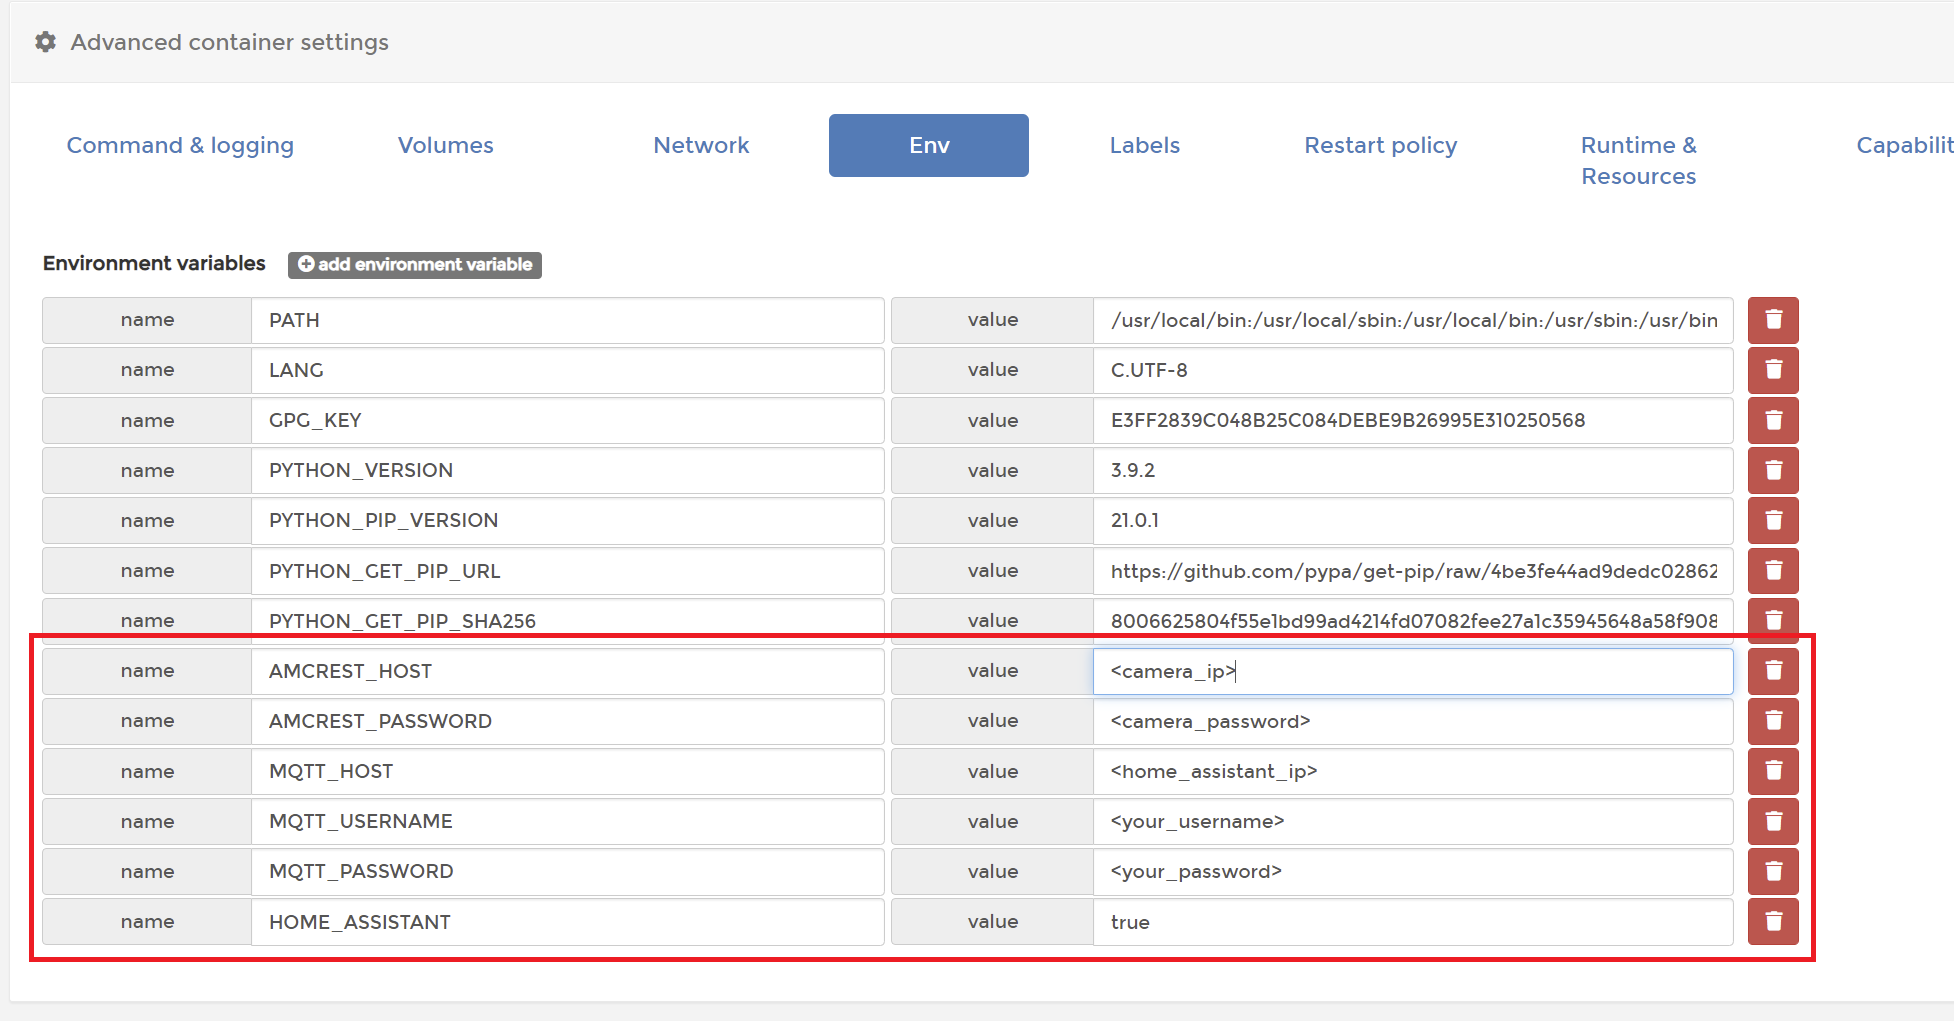
Finally, under Advanced > Restart policy choose Unless stopped. Deploy the container and ensure that it is running. The container logs should spit out some information about your camera, so check there to make sure the API is responding correctly.
02/05/2021 03:35:49 [INFO] Fetching camera details...
02/05/2021 03:35:52 [INFO] Device type: AD110
02/05/2021 03:35:52 [INFO] Serial number: ##############
02/05/2021 03:35:52 [INFO] Software version: 1.000.00AC006.0.R
02/05/2021 03:35:52 [INFO] Device name: Front Door
02/05/2021 03:35:52 [INFO] Writing Home Assistant discovery config...
02/05/2021 03:35:52 [INFO] Fetching storage sensors...
02/05/2021 03:35:54 [INFO] Listening for events...With the HOME_ASSISTANT flag set to true, the container will publish discovery messages over MQTT to create several new entities. The container also publishes state changes whenever the doorbell is pressed or motion is detected. As soon as the container is running, you should see the new doorbell device in Home Assistant. Note that the Storage sensors don't work unless you install an SD card in the doorbell.
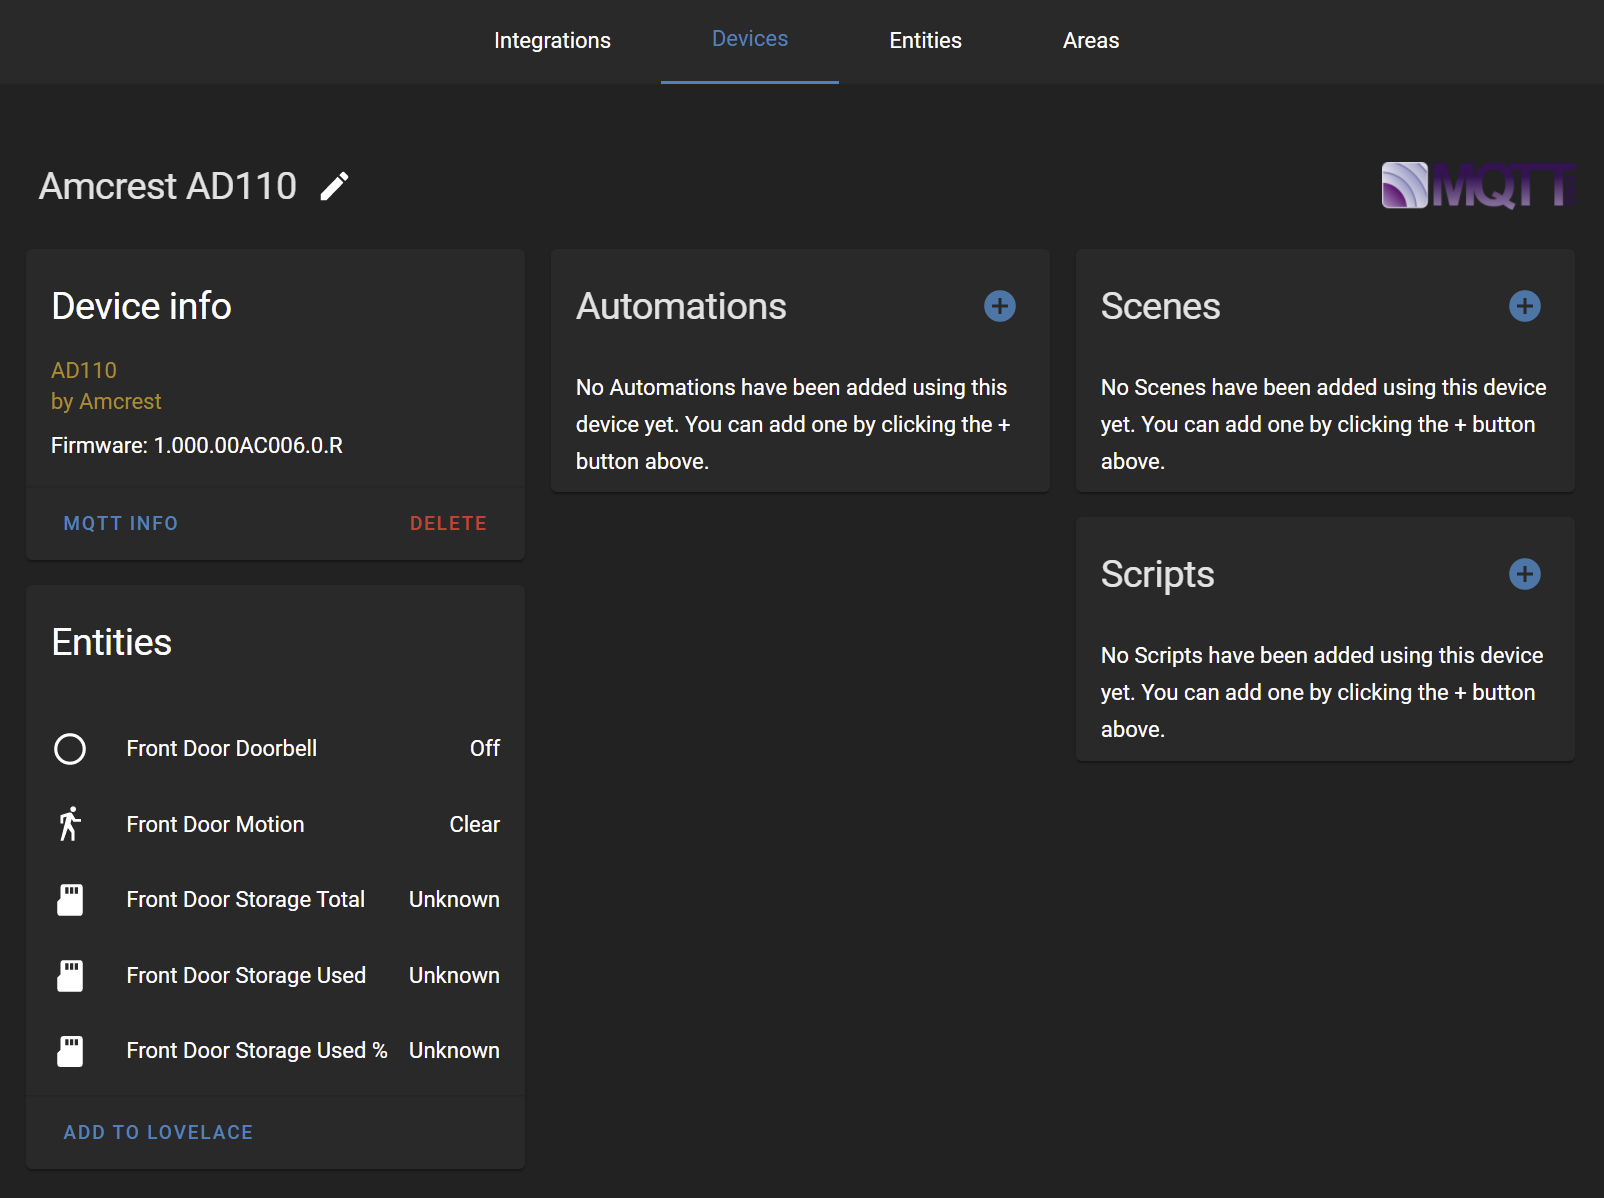
Now you can test the binary_sensor entities by triggering the motion sensor or the doorbell button. In my experience, the sensors are very responsive – they are usually as fast, or faster, than the actual Amcrest app. The sensors also continue work when disconnected from the internet.
Optional: Block Internet Access
At this point, I had everything I needed from the doorbell – a live feed, continuous recording, and hardware events – and I decided to take my doorbell completely offline. I did this using my router to block that IP from the internet. This way I don't have to worry about security vulnerabilities which might allow someone to snoop on my camera.
The trade-off is that the Amcrest app no longer works for answering the doorbell, but that is a feature which I can live without. I always have the option to disable the block if I want those features again temporarily.
Automation Example #1 - Virtual Peepholes
I have several kiosk tablets around the house running Fully Kiosk, so the first automation I set up was to bring up the live feed on each tablet when the doorbell is pressed.
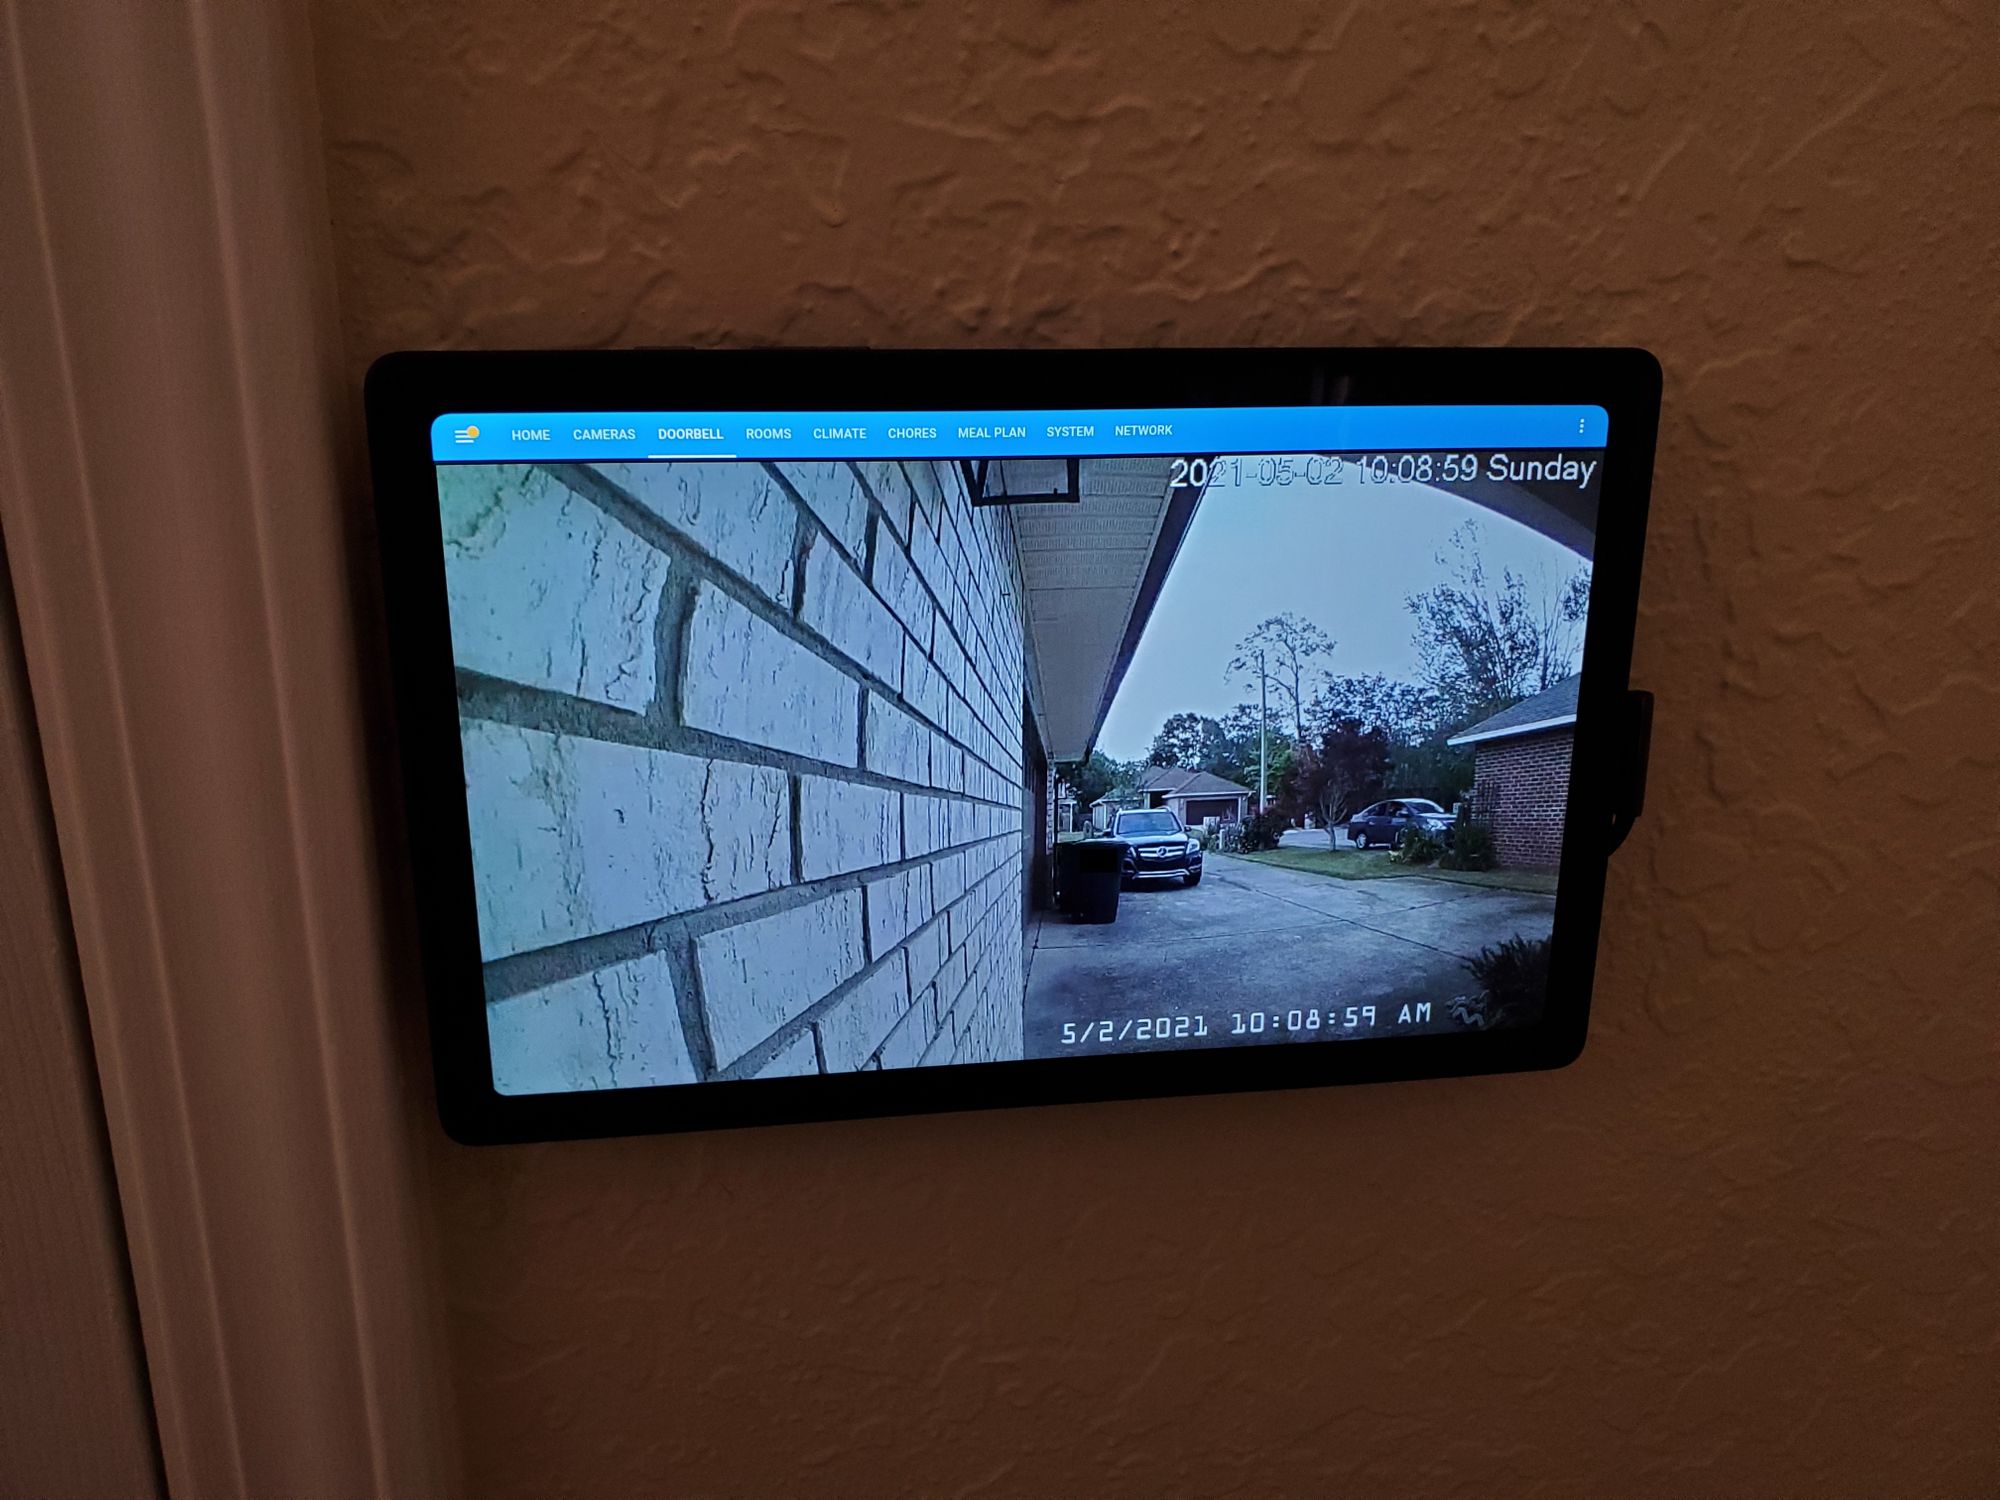
First, I added a view in Lovelace to show the live feed. This new view will be loaded up by my automation when the doorbell is pressed. The code here would depend on how you choose to integrate camera feeds into Home Assistant. I kept it very simple by using an iframe to pull up the Blue Iris web player.
title: Doorbell
path: doorbell-cameras
panel: true
cards:
- type: iframe
  url: !secret doorbell_480p_url
  aspect_ratio: '16:9'
Next, I set up my automations to load up the view when the doorbell button is pressed. This was very easy to do because I already have REST services set up in Home Assistant to control each kiosk.
I used Node-RED for the automation, but this could very easily be scripted out in YAML. It consists of three service calls:
- Turn on the screen, in case it was turned off for some reason
- Bring the Fully Kiosk app to the front, in case it had been minimized
- Navigate to the new doorbell view
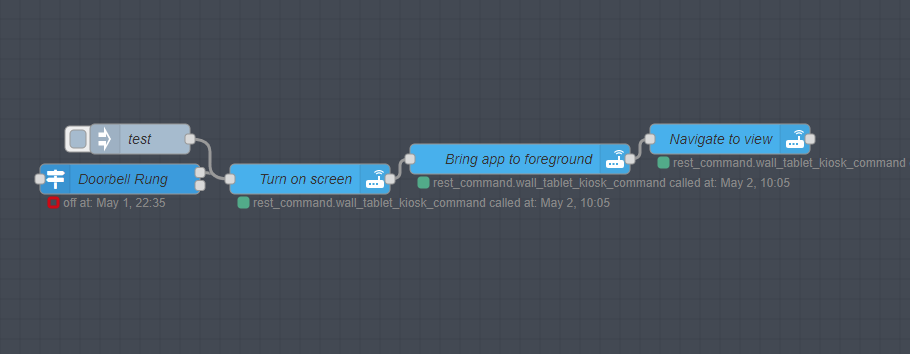
[{"id":"741d75fd.e0135c","type":"trigger-state","z":"2ef67aae.d4bfe6","name":"Doorbell Rung","server":"a86c4410.e2a568","exposeToHomeAssistant":false,"haConfig":[{"property":"name","value":""},{"property":"icon","value":""}],"entityid":"binary_sensor.front_door_doorbell","entityidfiltertype":"exact","debugenabled":false,"constraints":[{"targetType":"this_entity","targetValue":"","propertyType":"current_state","comparatorType":"is","comparatorValueDatatype":"str","comparatorValue":"on","propertyValue":"new_state.state"}],"outputs":2,"customoutputs":[],"outputinitially":false,"state_type":"str","x":220,"y":3000,"wires":[["b0291746.cff2c8"],[]]},{"id":"b0291746.cff2c8","type":"api-call-service","z":"2ef67aae.d4bfe6","name":"Turn on screen","server":"a86c4410.e2a568","version":1,"debugenabled":false,"service_domain":"rest_command","service":"wall_tablet_kiosk_command","entityId":"","data":"{\"cmd\":\"screenOn\"}","dataType":"json","mergecontext":"","output_location":"","output_location_type":"none","mustacheAltTags":false,"x":410,"y":3000,"wires":[["b8514a52.6e3fd8"]]},{"id":"b8514a52.6e3fd8","type":"api-call-service","z":"2ef67aae.d4bfe6","name":"Bring app to foreground","server":"a86c4410.e2a568","version":1,"debugenabled":false,"service_domain":"rest_command","service":"wall_tablet_kiosk_command","entityId":"","data":"{\"cmd\":\"toForeground\"}","dataType":"json","mergecontext":"","output_location":"","output_location_type":"none","mustacheAltTags":false,"x":620,"y":2980,"wires":[["4cbd748a.3d9d9c"]]},{"id":"4cbd748a.3d9d9c","type":"api-call-service","z":"2ef67aae.d4bfe6","name":"Navigate to view","server":"a86c4410.e2a568","version":1,"debugenabled":false,"service_domain":"rest_command","service":"wall_tablet_kiosk_command","entityId":"","data":"{\"cmd\":\"loadURL\", \"url\":\"http://192.168.1.53:8123/wall-tablet/doorbell-cameras\"}","dataType":"json","mergecontext":"","output_location":"","output_location_type":"none","mustacheAltTags":false,"x":830,"y":2960,"wires":[[]]},{"id":"4c31f2b2.94f04c","type":"inject","z":"2ef67aae.d4bfe6","name":"test","props":[{"p":"payload"},{"p":"topic","vt":"str"}],"repeat":"","crontab":"","once":false,"onceDelay":0.1,"topic":"","payload":"","payloadType":"date","x":240,"y":2960,"wires":[["b0291746.cff2c8"]]},{"id":"a86c4410.e2a568","type":"server","name":"Home Assistant","legacy":false,"addon":true,"rejectUnauthorizedCerts":true,"ha_boolean":"y|yes|true|on|home|open","connectionDelay":true,"cacheJson":true}]I repeated this flow for each of my kiosks. Now when the doorbell is rung, the live feed pops up on all of my tablets giving me a virtual peephole for the front door no matter where I am in the house.
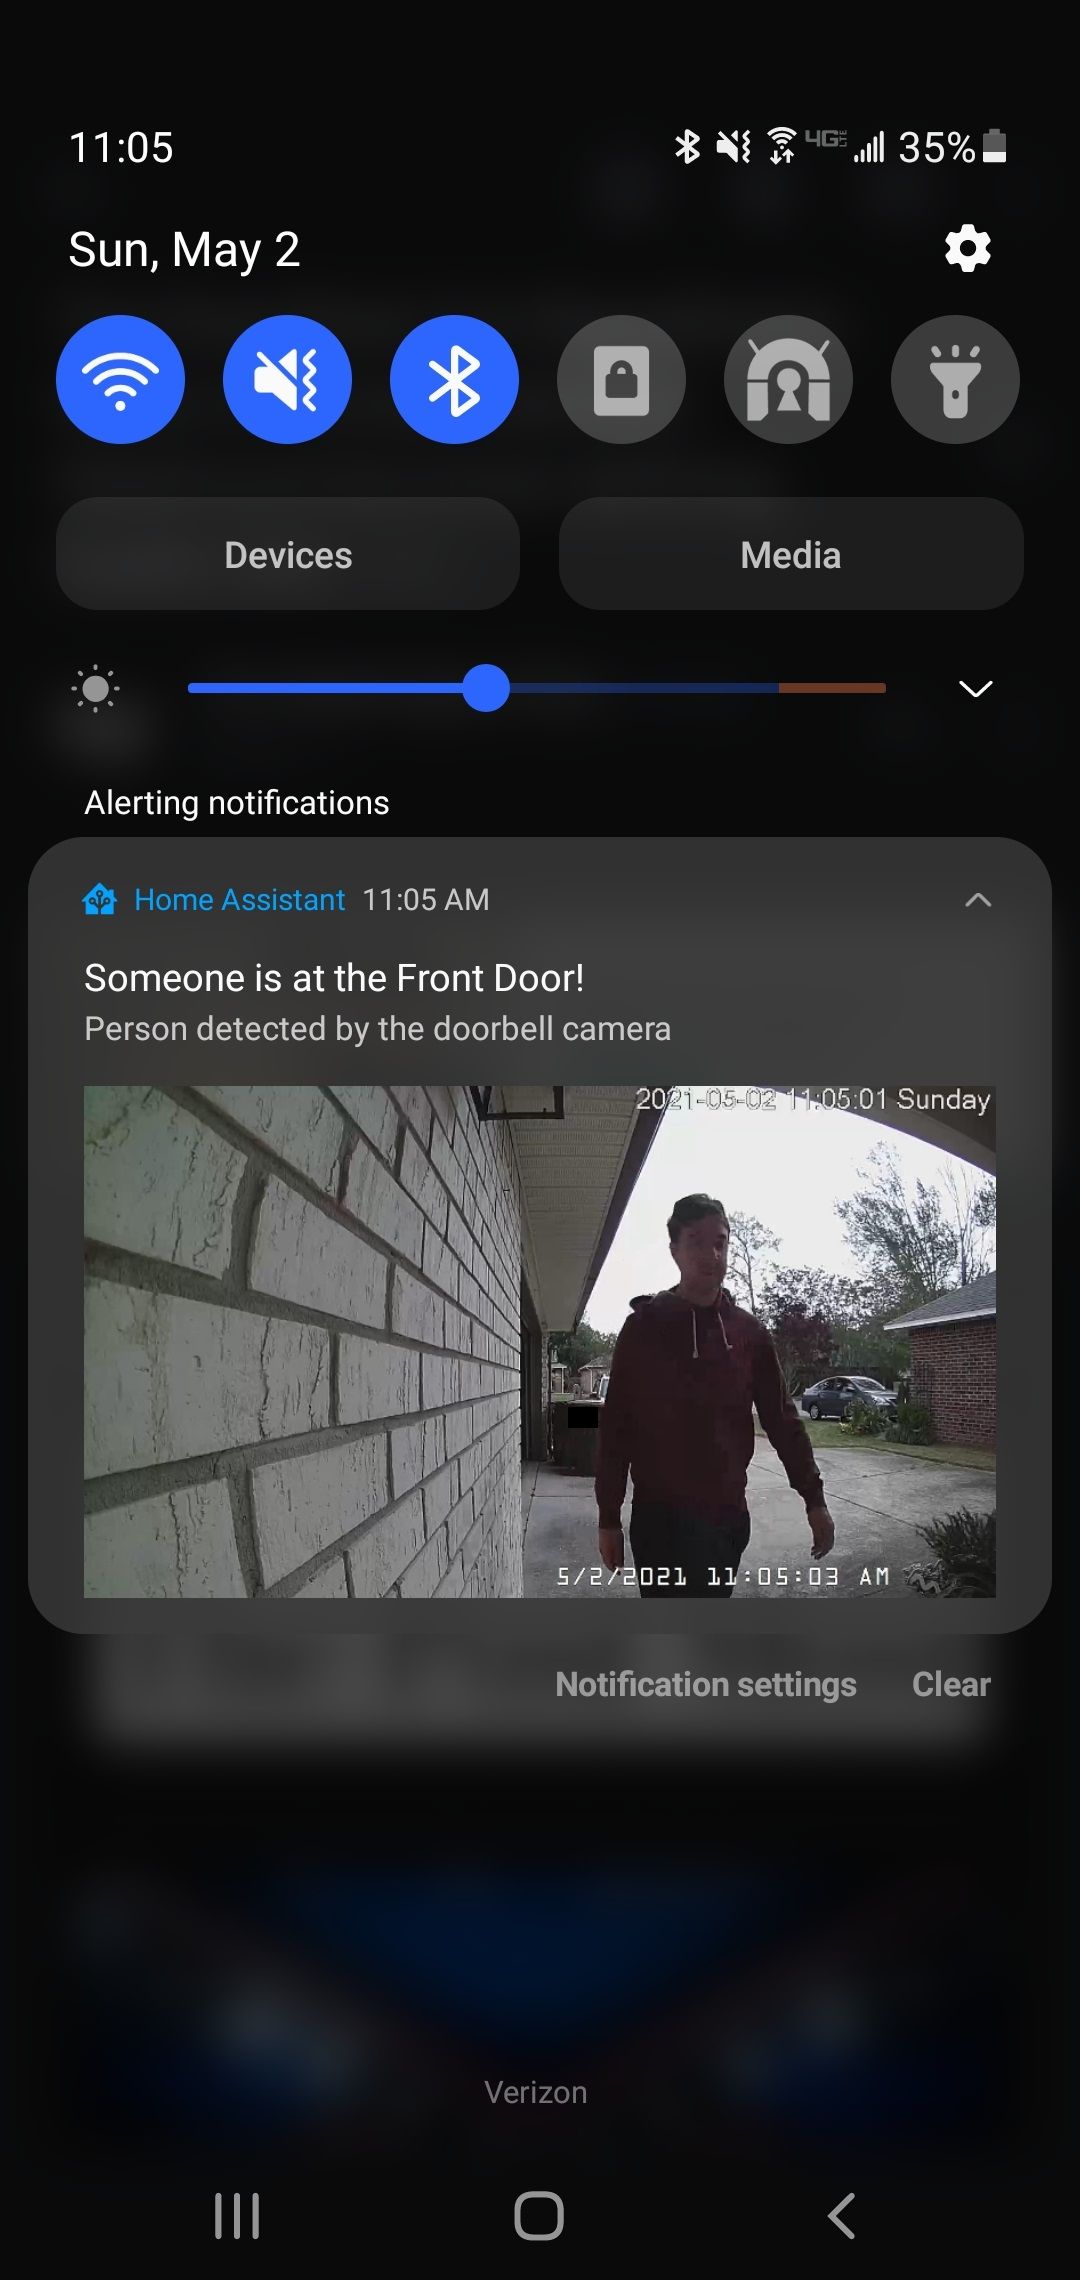
Automation Example #2 - AI Enhanced Push Notifications
The next automation I set up was mobile push notifications which trigger when someone is at the front door. At first, I used the doorbell press as my trigger, but I was missing a lot of events because my local delivery drivers usually do not press the doorbell. I decided to instead use motion events to trigger the notifications, with AI to filter out only the events which actually contain people.
This automation relies on a bunch of tools which I have already set up – Blue Iris, Last Watch AI, Samba sharing, Android/iOS notifications, and Node-RED. It was easy for me to add this automation, but to show all of the prerequisite setup would take a whole post. Here is just a summary of how it works:
- Blue Iris triggers motion events when a person approaches the doorbell. The motion detection is fine tuned to only trigger on very large objects (otherwise it will trigger when the person is far away and hard to identify).
- Last Watch AI checks the event snapshot for humans. If a person is in the event, the snapshot is sent over to Home Assistant.
- A Node-RED flow is triggered when the new event comes in to Home Assistant. The flow publishes push notifications containing the event snapshot to each mobile device.
- The Node-RED flow then blocks itself until the person has cleared the area. I already have AI sensors that turn on whenever a person is in the driveway, so I just wait for those to turn off. This is important because we only want to generate one notification per "approach".
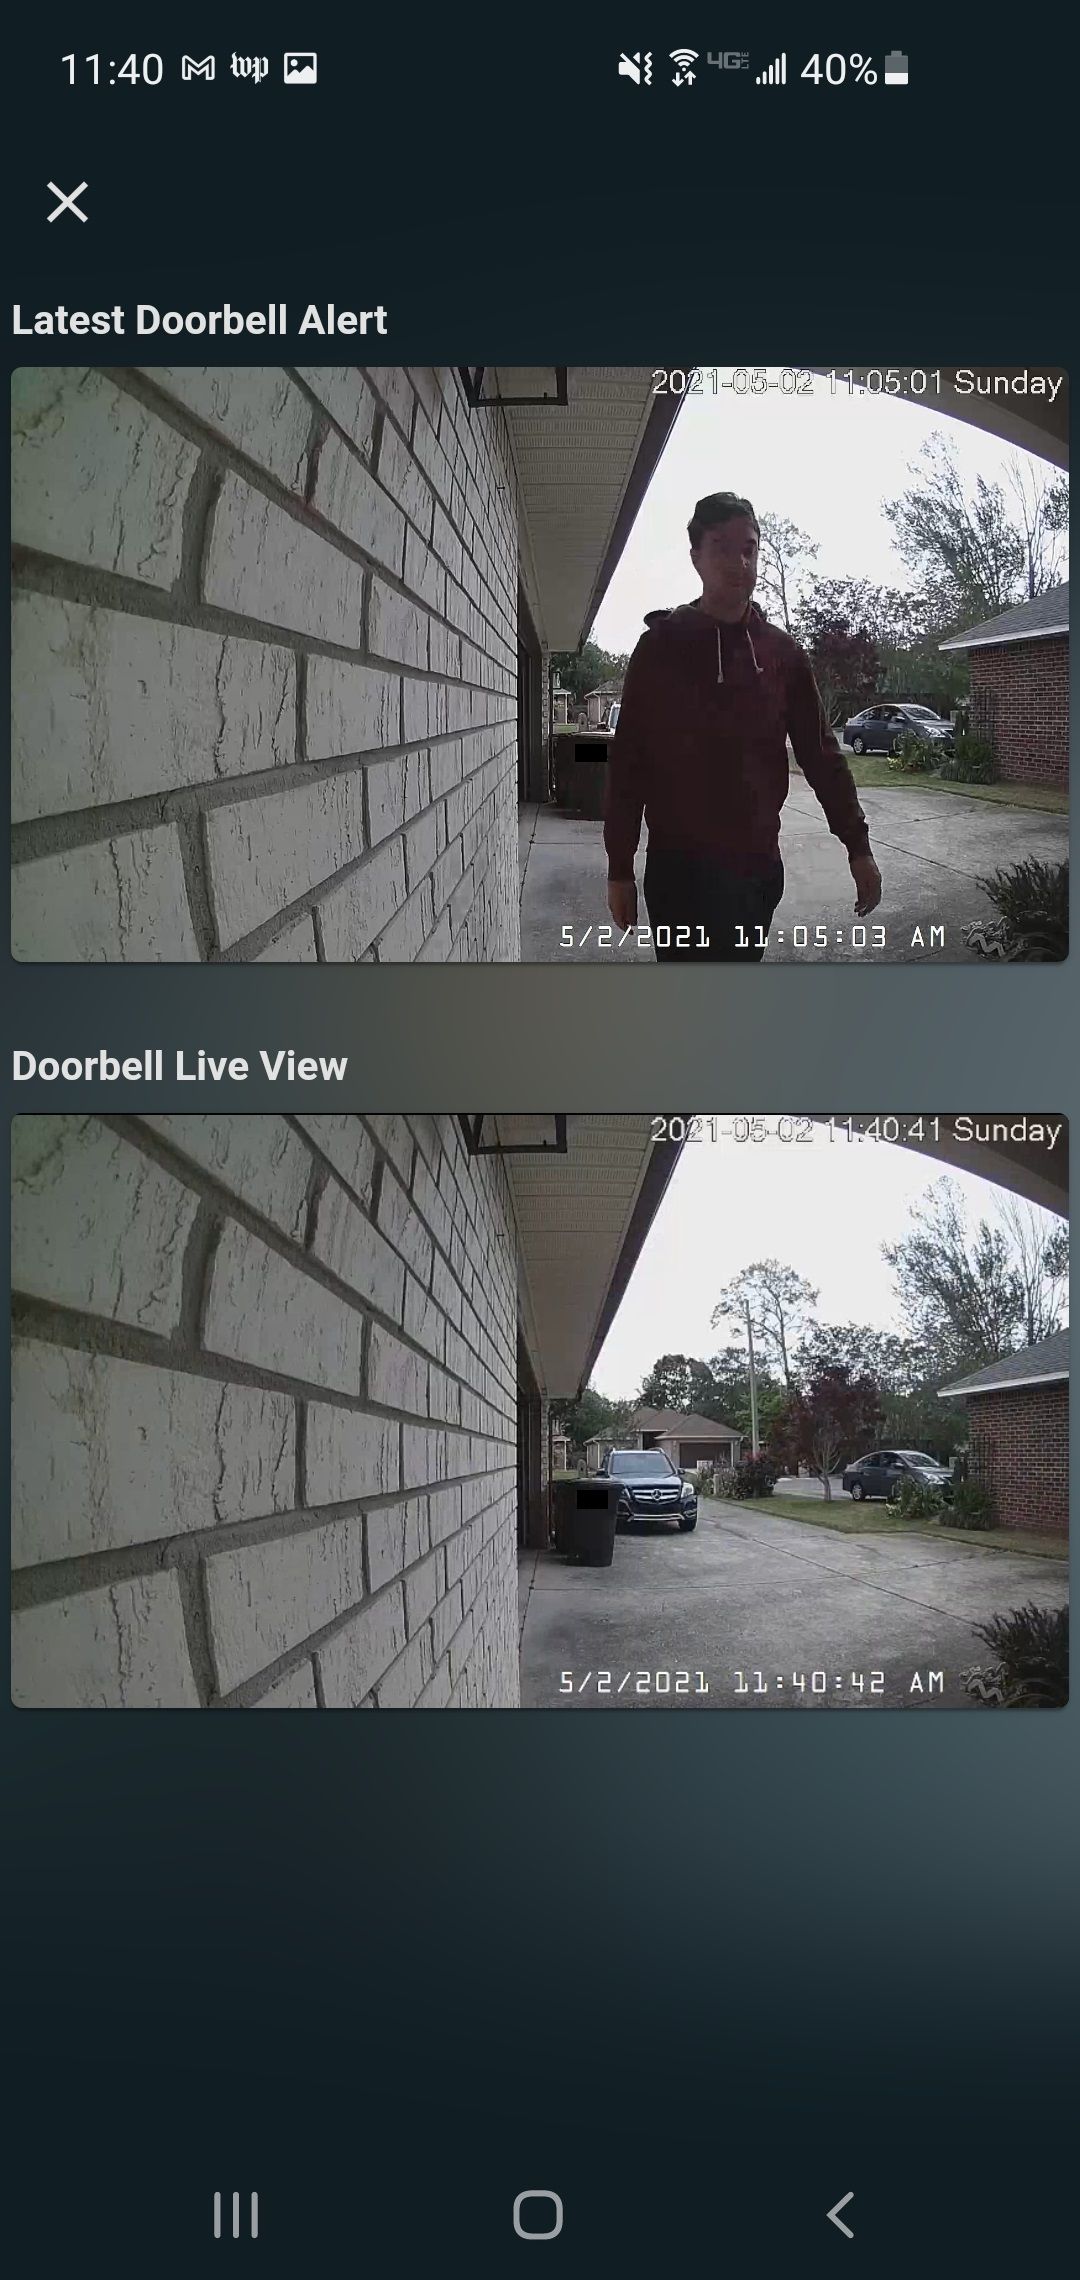
The result is a push notification that consistently shows every approach to the doorbell. The notifications almost always show the person when they are close to and facing the camera, which is perfect for package deliveries because you can see the driver holding the package.
Tapping the notification also brings up the full size image along with the live feed.
Other Automations
Here are the other automations I am working on:
- Push notifications for doorbell button presses
- Record and play back video clips of recent doorbell approaches
- Turn on lights inside the house if a person approaches while nobody is home to make it look like someone is home
- Automatically unlock doors with AI face detection
Thanks for reading!